Collaboration and Sharing
HoloBit enables real-time collaborative modeling, experimentation, and management through role-based permissions, applicable at both the workspace (team) level and the individual file-sharing level.
Overview
For multi-user collaboration, besides the Owner (creator of the Workspace or file), HoloBit provides three primary roles with different permission levels:
- Can manage
- Can edit
- Can view
The Owner, acting as the super administrator, can assign these roles to each collaborator. The specific permissions granted to each role for various management and creative tasks are detailed in the table below.
Roles and Permissions
The table below outlines each role's specific permissions in terms of management and creation tasks.
| Category | Permission | Description | Owner | Manager | Editor | Viewer |
|---|---|---|---|---|---|---|
Account | Assign roles | |||||
| Manage global tags | Add, delete, modify | |||||
| Manage data | Upload, download | |||||
| Manage blocks | Create, delete, modify | |||||
| Manage workspace | Avatar, profile, etc. | |||||
| View members | ||||||
| Link invitations | Approval required | |||||
| Approve a join request | ||||||
| Remove members | ||||||
Folders | Create | |||||
| Manage | Rename, etc. | |||||
| Delete | ||||||
| View | ||||||
Files | View files | Models, experiments, dashboards | ||||
| Create files | Create | * | ||||
| Create copies | * | |||||
| Edit files | Rename, add tags and description, etc | |||||
| Delete files | ||||||
| Move files | ||||||
| Copy files to external | According to permission settings | |||||
| Copy library to external | According to permission settings | |||||
| Invite external collaborators | According to permission settings | |||||
| Publish files | According to permission settings | |||||
| Share embedded links | According to permission settings | |||||
| Manage scenarios | Create, delete, duplicate and rename | |||||
Modeling | View | |||||
| Run | ||||||
| Edit model | ||||||
| Set tag set | Edit, delete | |||||
Experiment | View | |||||
| Run | ||||||
| Edit experiment | ||||||
| Manage remote run history | Delete, upload |
- When a user creates a Holo file in the workspace, they get Editor access by default to that file (marked as "√*" in the table), but the workspace owner can still change it.
- Specific "○" marked actions (e.g., copying files to external, publishing to Marketplace, getting embed links) can be assigned to different roles or disabled entirely.
Assigning Roles to Team Members
The workspace owner can flexibly assign permissions for each role through two methods:
-
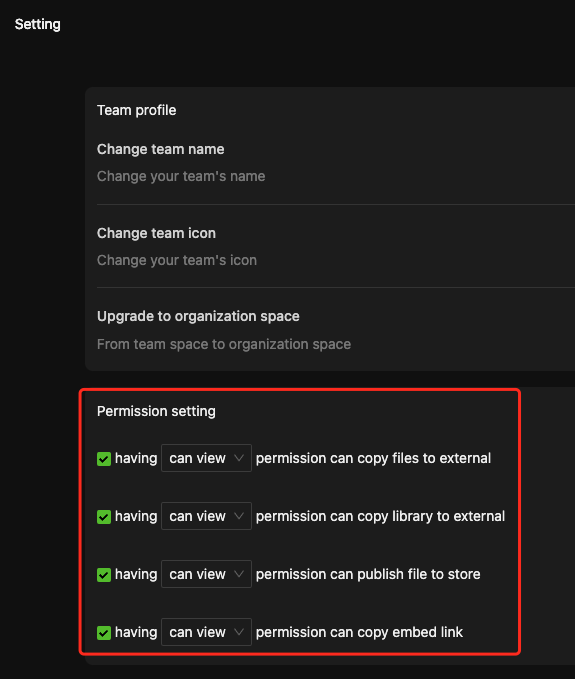
Navigate to Workspace settings.
-
Under "Permission setting," you'll find toggles and dropdowns for actions like:
- Copying files to external (workspaces)
- Copying library to external (workspaces)
- Publishing files to Marketplace
- Getting embed links
-
If unchecked: No role (except owner) can perform the action.
-
If checked: Select the minimum role (Can Manage, Can Edit, Can View) from the dropdown that will be granted this permission.
This applies as a default for all files in that workspace.
- In Holo File Share Dialog
-
When sharing a Holo File, click on "Permission setting >".
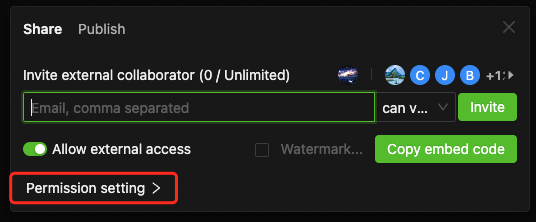
-
Similar to the workspace settings, you can select the minimum role (Can Manage, Can Edit, Can View) from the dropdown that will be granted this permission.
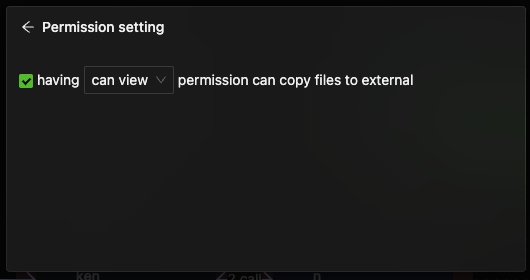
That file-level setting overrides the workspace default for the current file.
Team Management
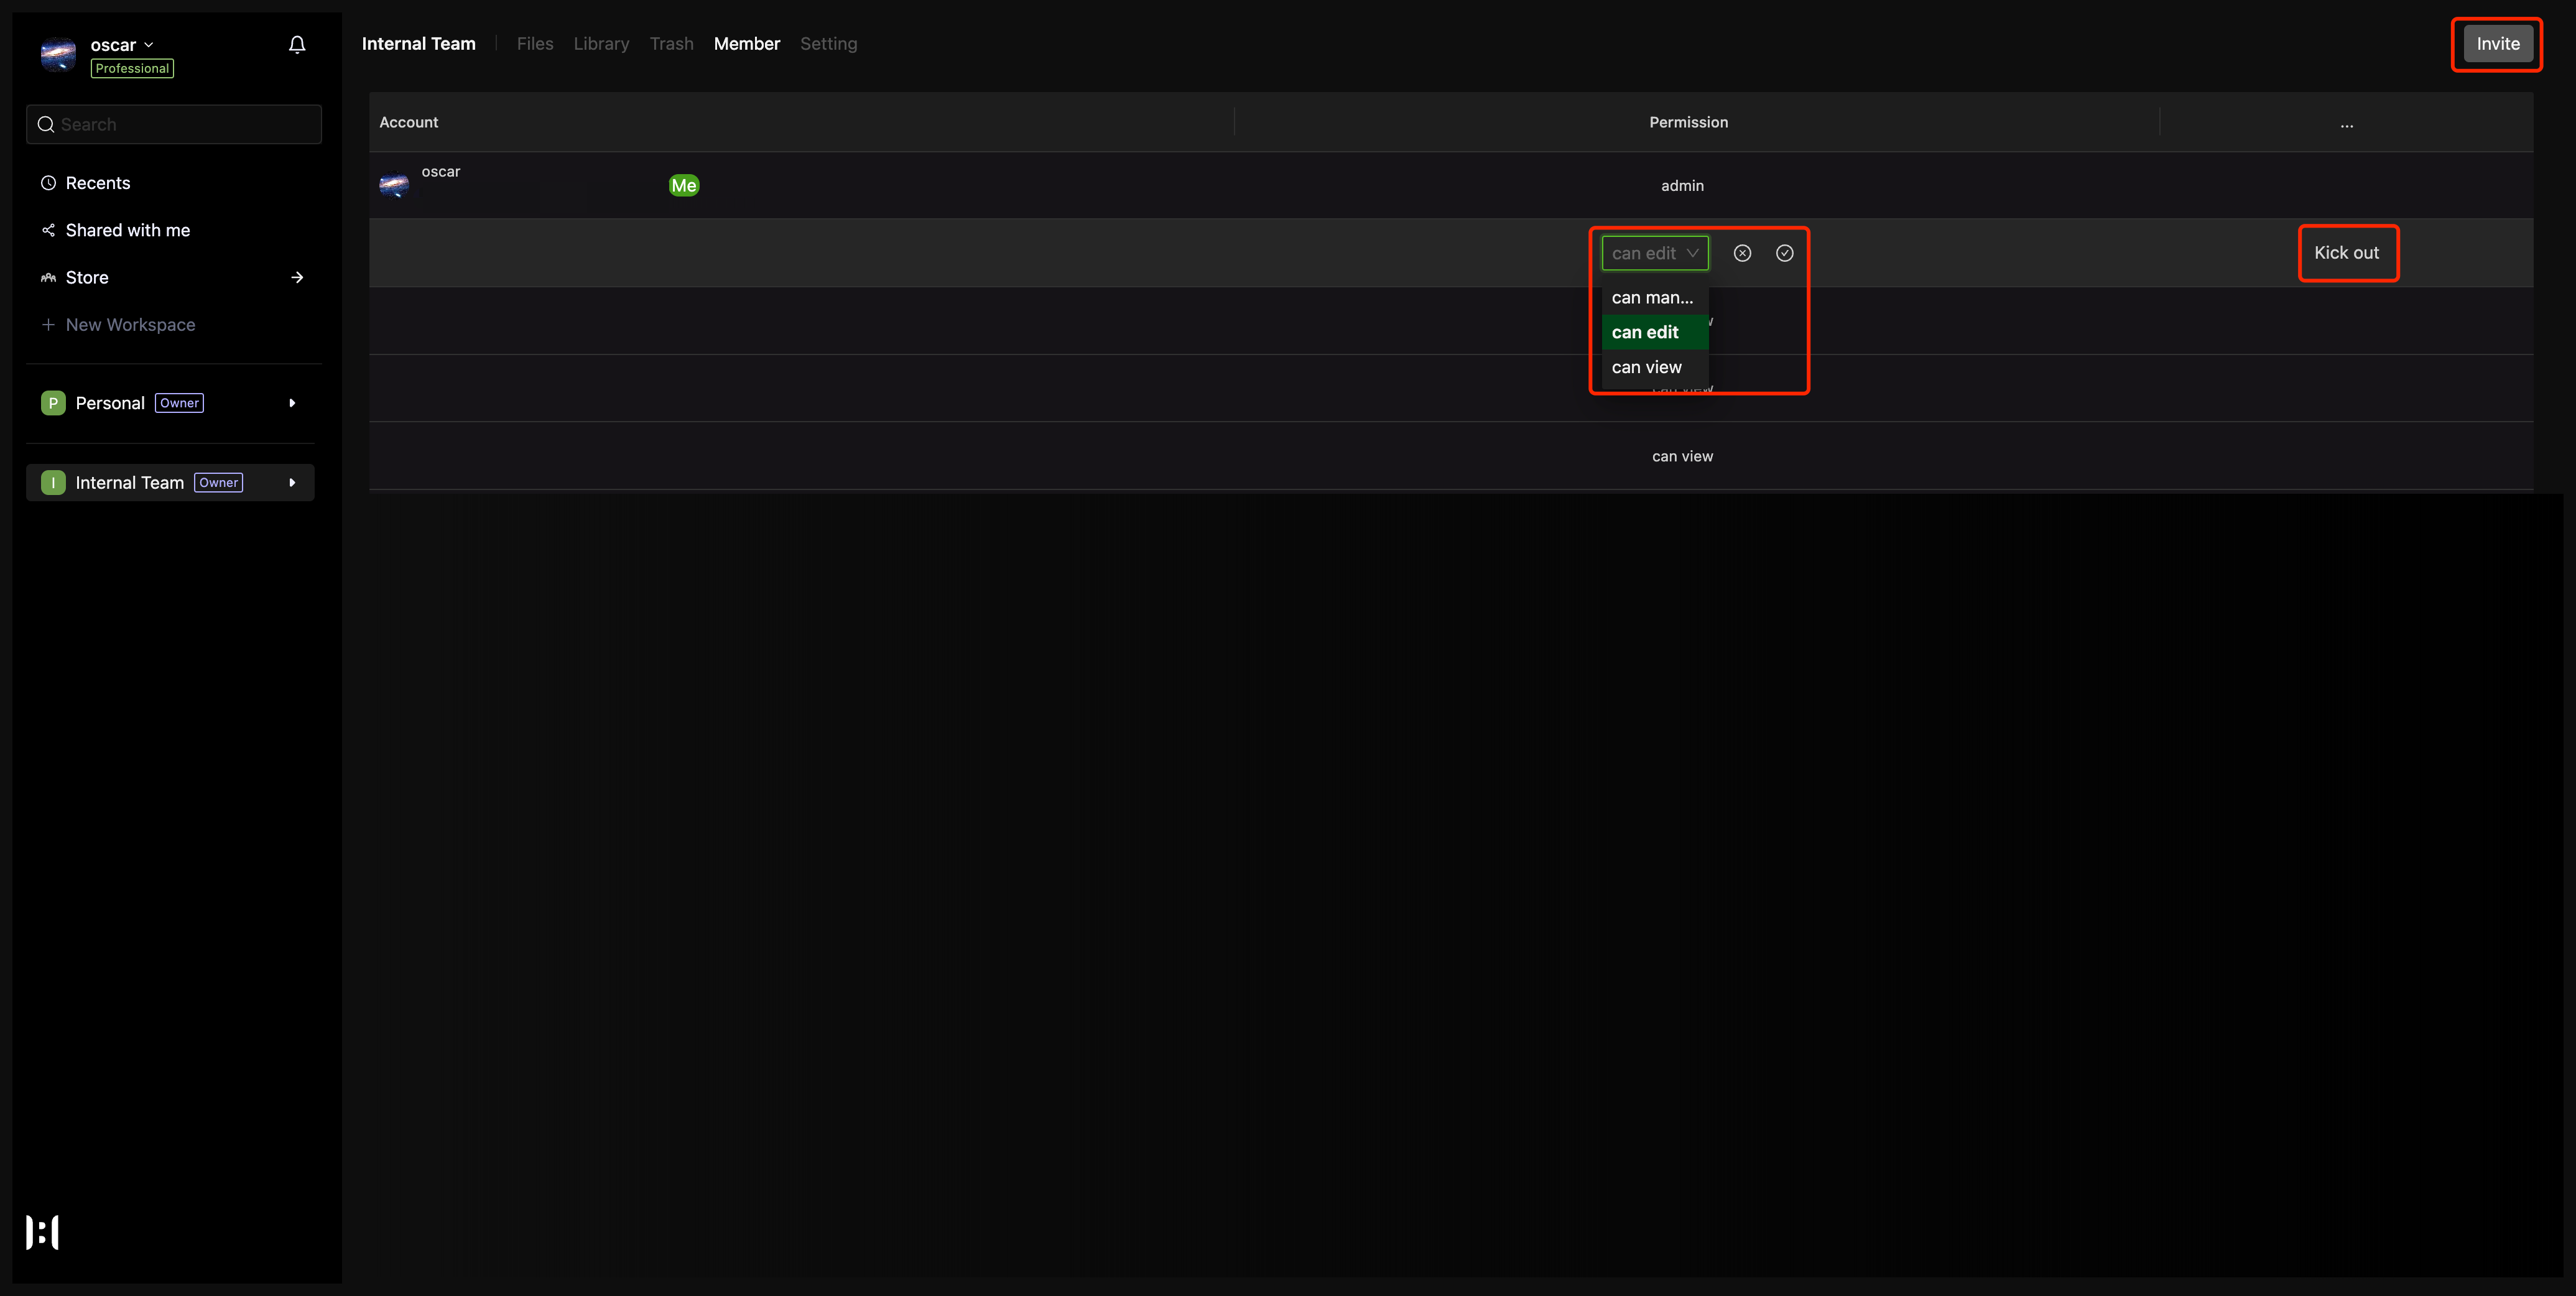
Manage your Workspace team members via the Member tab in the Workspace header.
Inviting Members
Workspace Owner
A workspace owner can invite new members via the "Invite" button in the top-right corner of the workspace's Member page.
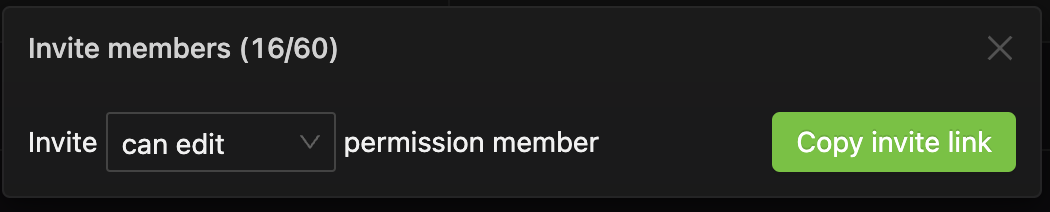
- Select Role: Choose the permission role for the invitee(s).
- Copy Invite Link: Click to copy the generated link.
- Send Link: Share the link with the prospective member. They need to click it to initiate their join request.
- Owner Approval (Often Required): The workspace owner needs to approve the new member's request to join after they've accepted the invitation.
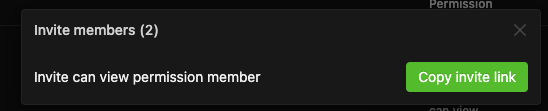
Existing Collaborators
Any existing collaborator can invite a new viewer, but the owner must approve before they officially join.
Approving Join Requests
When an invited user clicks the invitation link, the workspace owner will see their pending join request in the Member tab.

The Owner can Approve or Reject the request.
Modifying Member Roles
Only the owner can change a team member's role within the workspace.
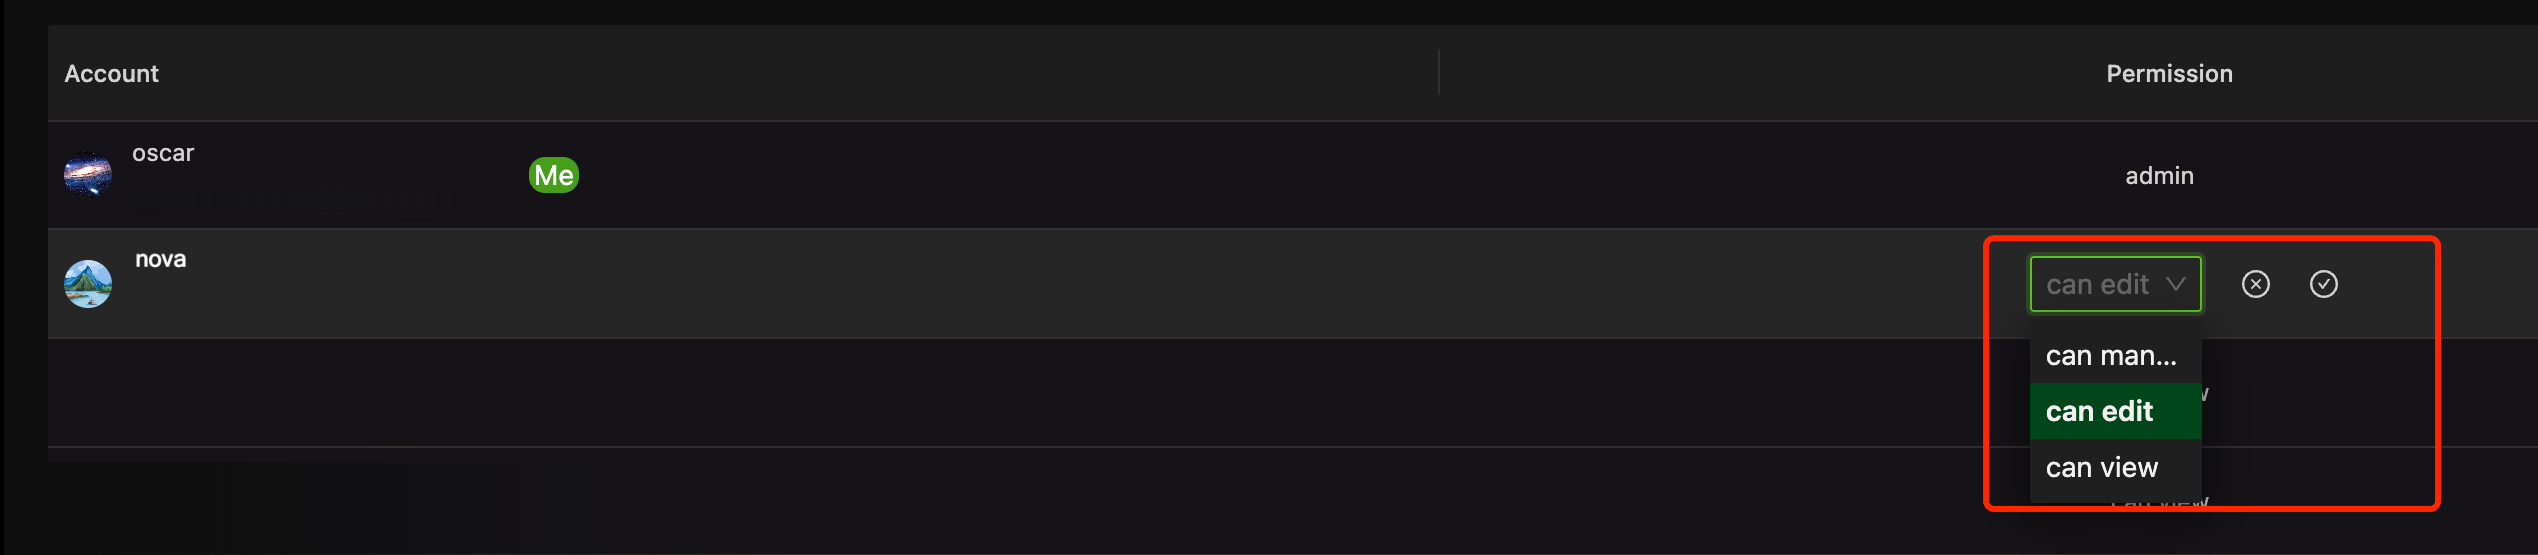
Pick the new role from the dropdown, click confirm, and that member's role updates immediately.
Removing Members
Hover over the member you wish to remove, and a Kick out button appears on the right. The owner can click it to remove the member from the workspace.

Leaving a Team
A collaborator can leave the team on their own, without approval.
Hover over your own row and click Leave.

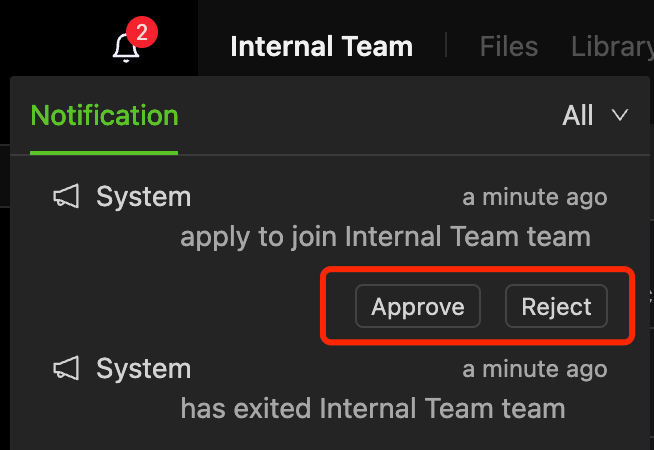
Viewing Changes & Quick Actions
When membership changes, a system notification appears in the Notification Center.
The owner can quickly approve or reject new join requests directly from the notification center.
File-based Collaboration
While workspace team members already have default access to all files in the workspace, you may also share a specific file with external users.
Inviting External Collaborators
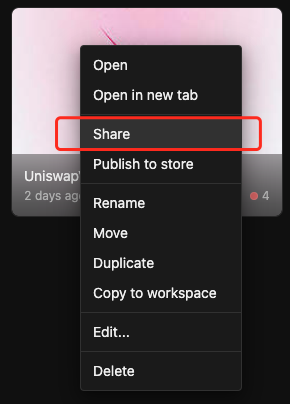
Method 1: Right-click on the file → Share
-
Navigate to the file you wish to collaborate on. Right-click → Share
-
Enter the invitee's email address (multiple emails separated by commas) in the pop-up window.
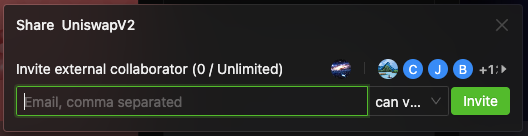
-
Choose the appropriate permission role from the dropdown menu.
-
Click "Invite".
-
The invitation is complete when the invitee clicks "Accept" in their email or HoloBit notification. No further approval from the workspace owner is needed.
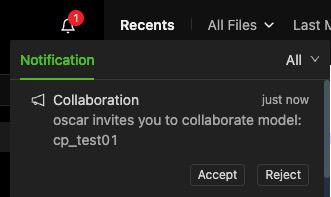
Invitees must have a HoloBit account. If they don't have one, they will be prompted to sign up before they can accept the invitation.
Method 2: File editing interface → Share
-
Open the file you wish to collaborate on. Click the "Share" button in the top-right corner.
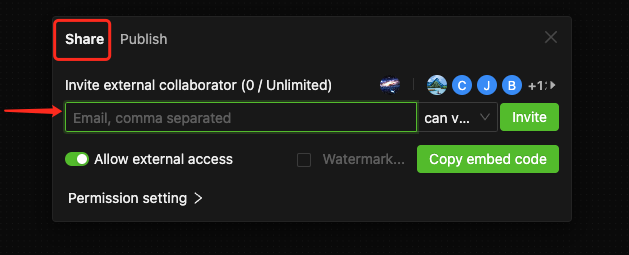
-
Other steps are the same as Method 1.
- This invitation is file-specific and doesn't grant access to the entire workspace team.
- The number of external collaborators you can invite depends on your subscription plan.
- Be cautious with role-based settings: if you grant "copy to external" to an external Editor, they can potentially export your work.
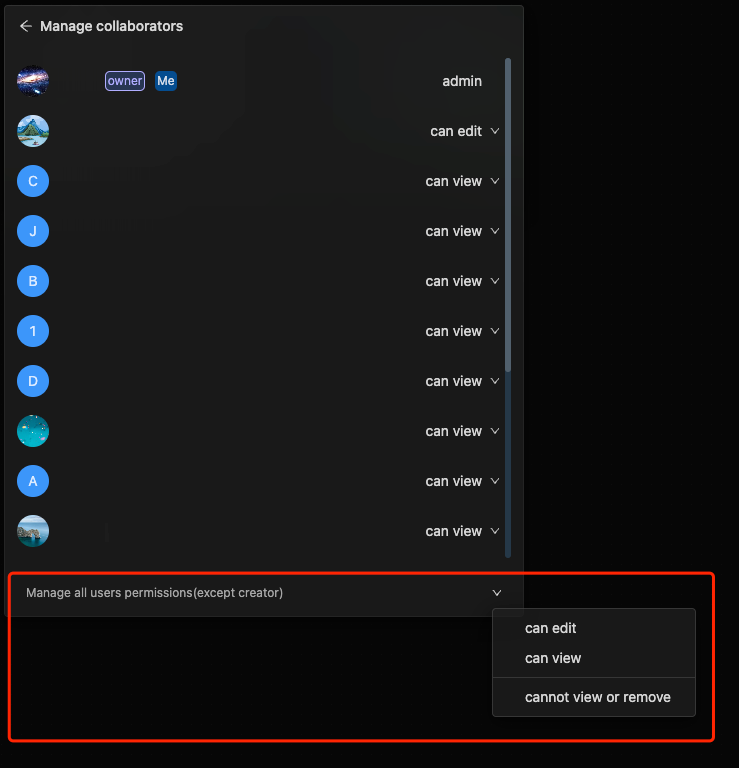
File-Level Permissions
External collaborators on the file are managed the same way as internal team members. The owner can set roles for all collaborators.
To set permissions:
-
Click the collaborator's avatar to see a list of all members on this file.

-
Use the dropdown to switch each member's role.
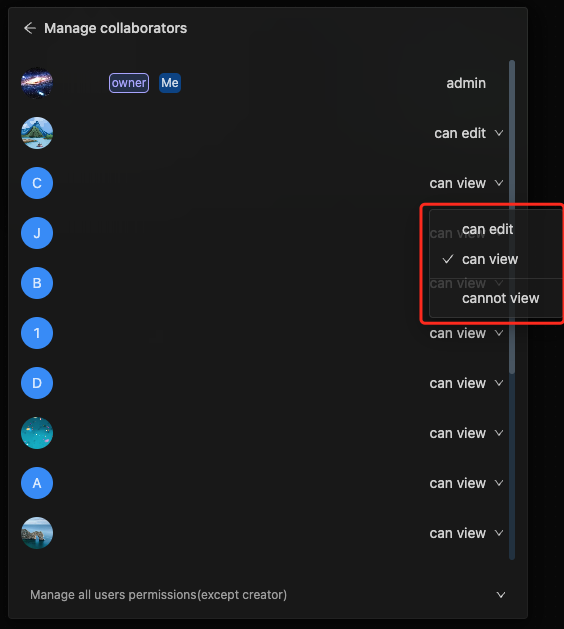
-
Or apply batch role settings at the bottom.
Scenario-Level Permissions
For each scenario within a Holo file, you can refine permissions further.
-
In the Holo File editing interface, open the
⋮(kebab) menu next to the scenario name.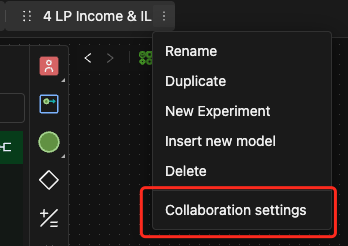
-
Select "Collaboration settings".
-
For each collaborator, you can set a specific permission role for that scenario only, either individually or in bulk. This means a collaborator might have different levels of access to different scenarios within the same Holo File.
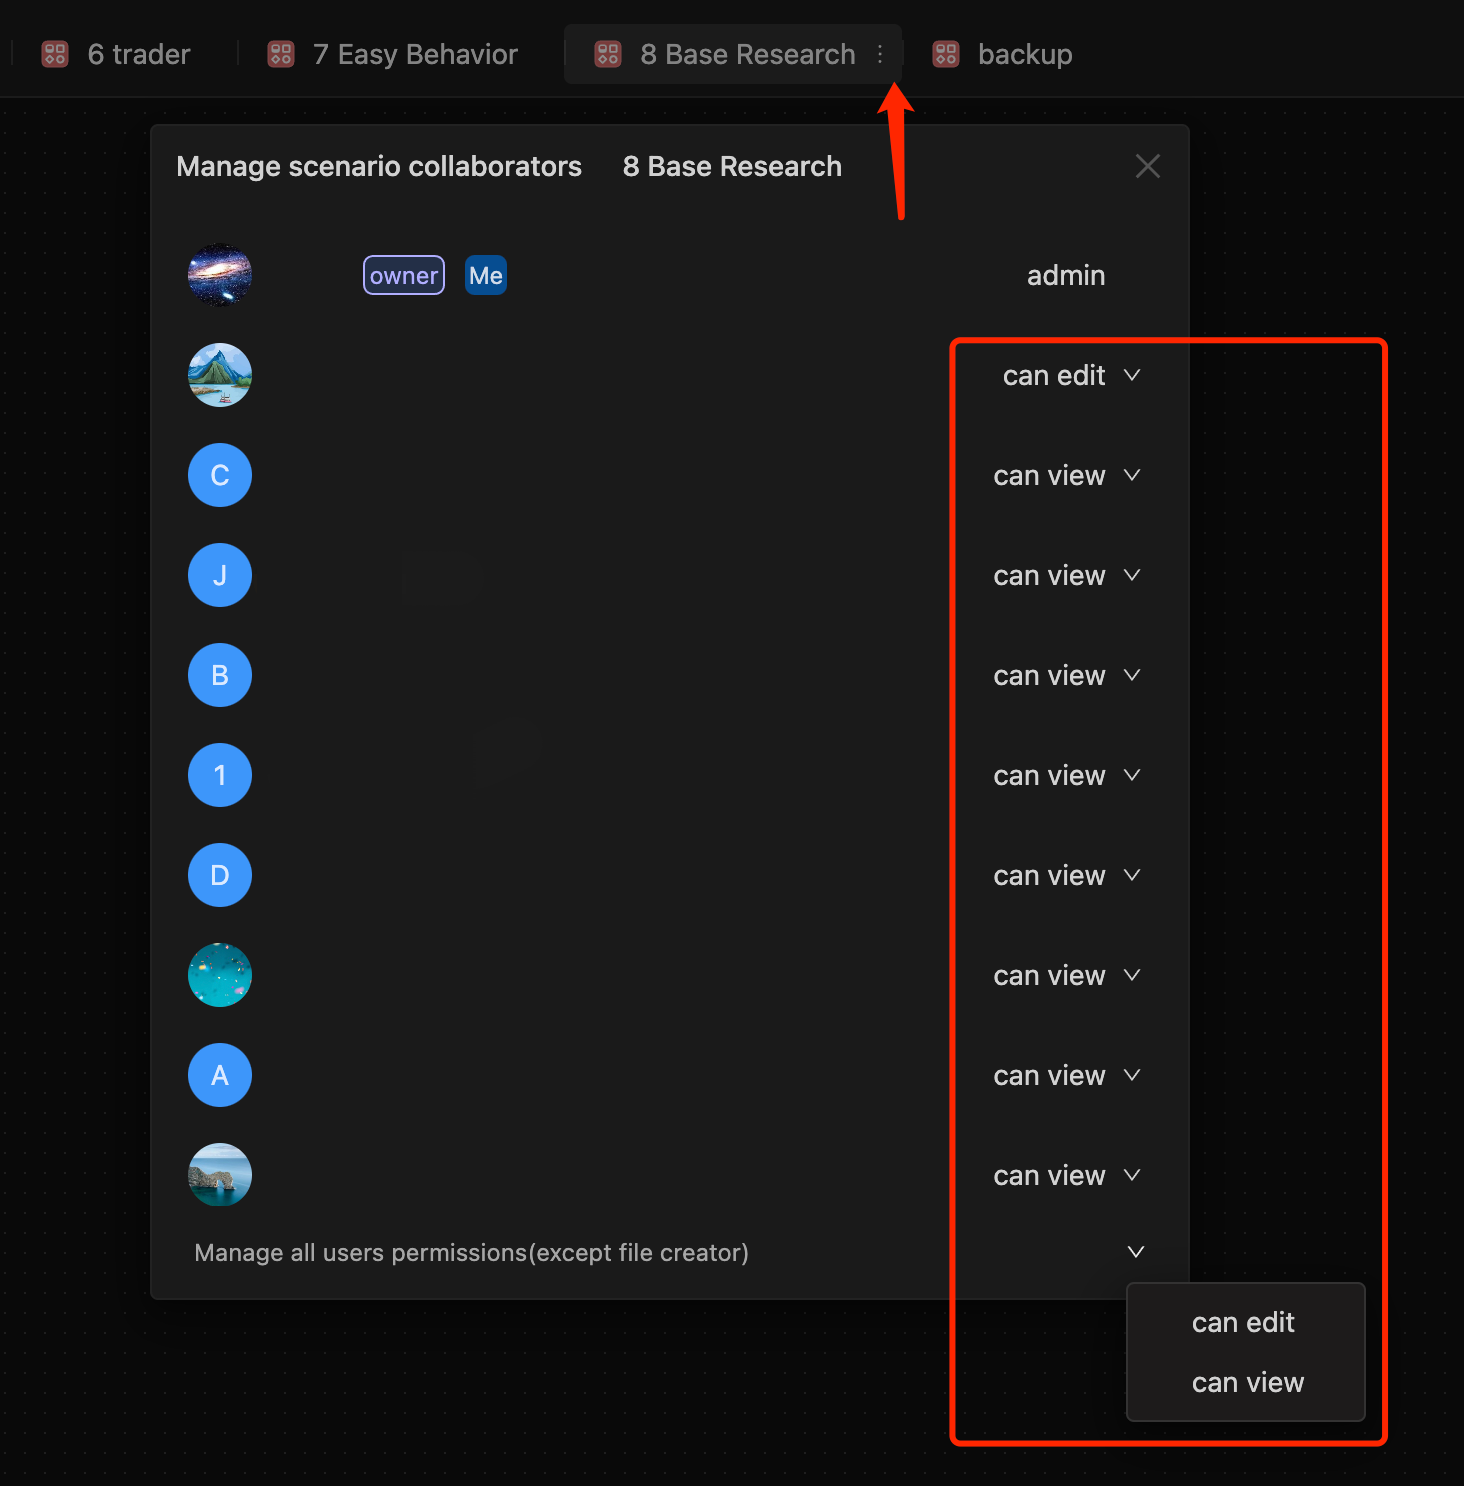
- The priority of collaboration permissions is as follows: A. Workspace member management permissions < B. File collaboration permissions < C. Scenario collaboration permissions.
- You can think of A as a permission template. Any newly created Holo file will use this template by default, but once specific permissions are configured for an individual file, the default settings are overridden. The same applies to scenario permissions (B).