Files and Library
This chapter details how to create and manage various types of files and assets within your HoloBit workspace, including Holo Files, Block Files, and Global Tag Sets.
Holo Files
Creating Holo Files
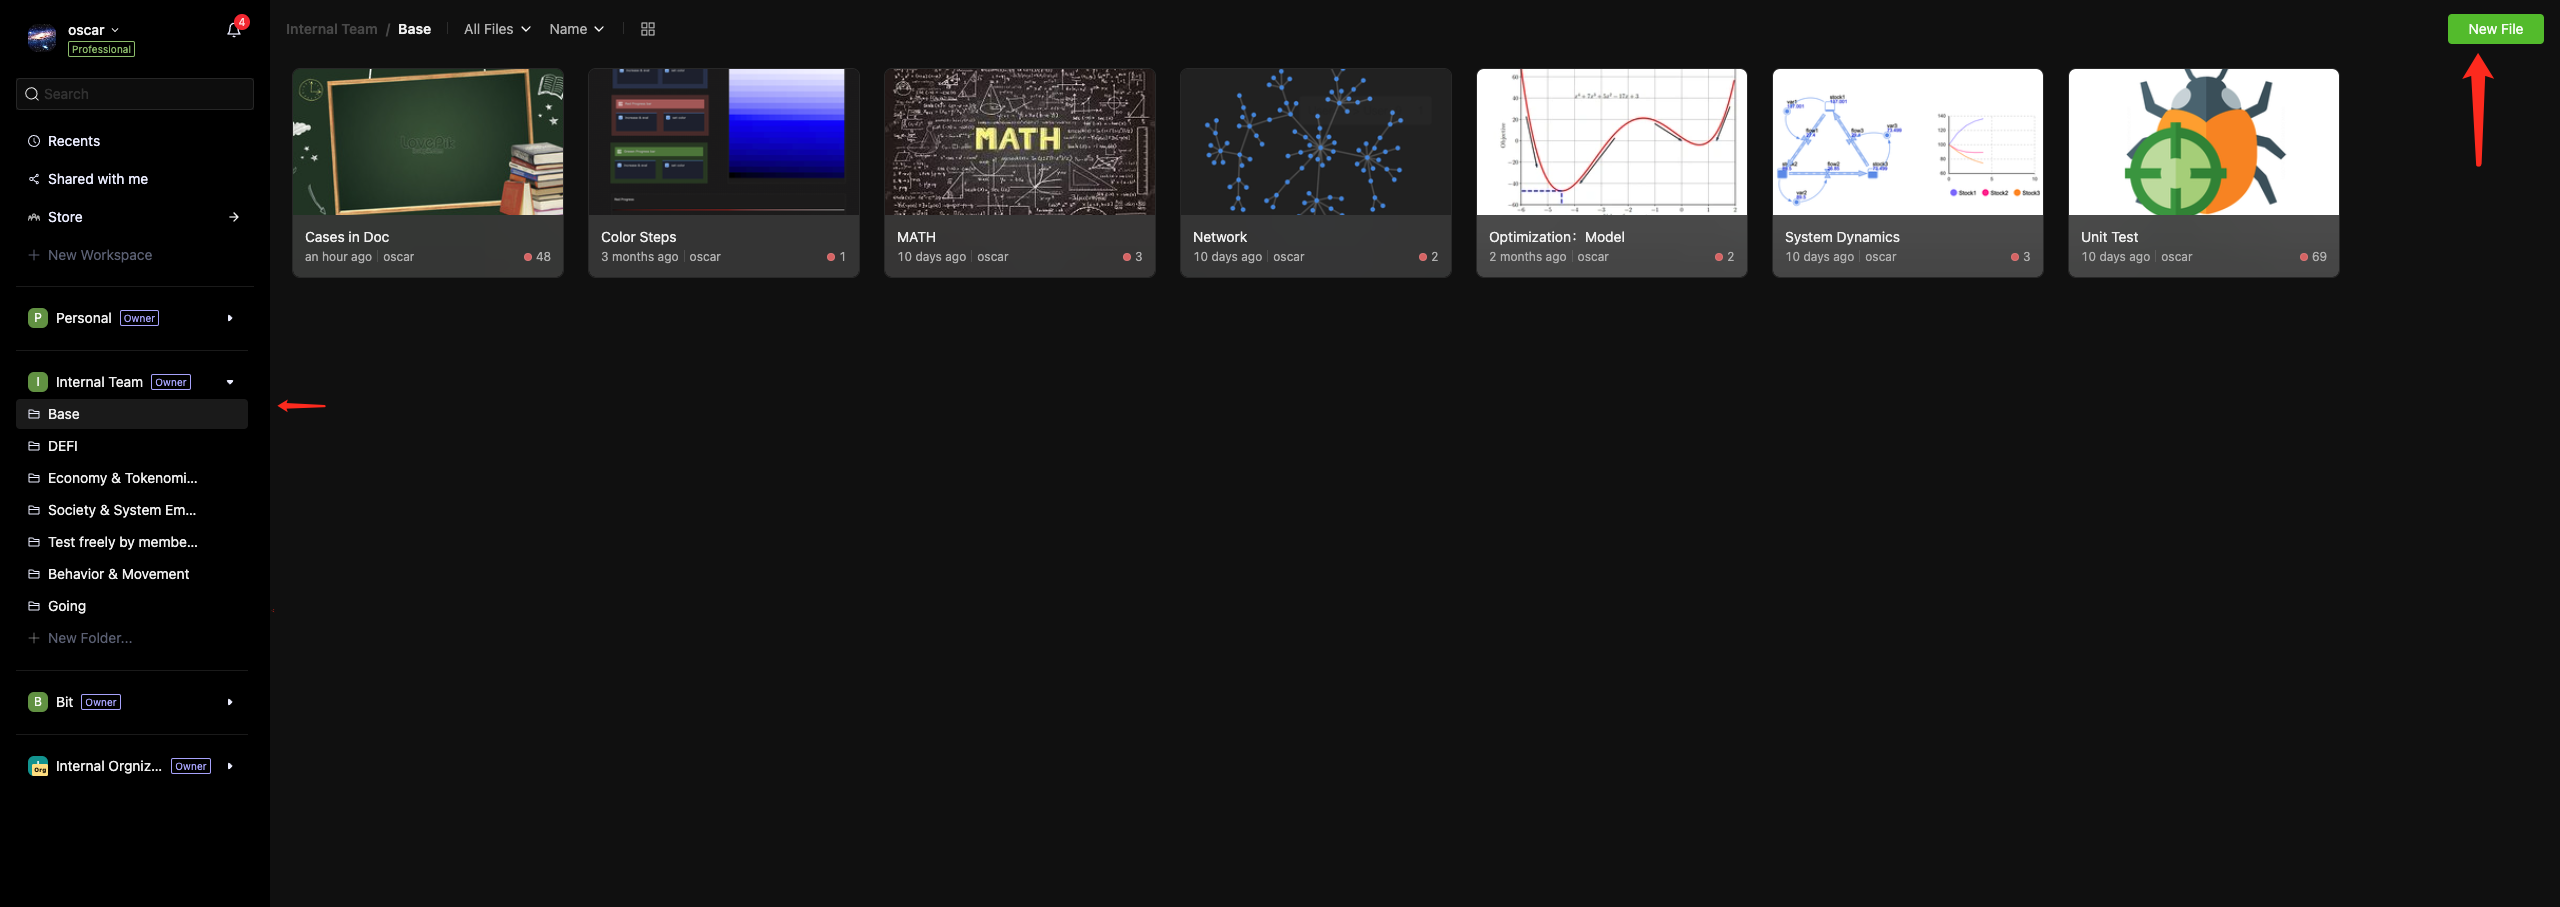
- Navigate to a Folder
- Within a workspace, select the folder where you want to create the new Holo File.
- Click the "New File" Button
- In the upper right corner of the folder, click the "New File" button.
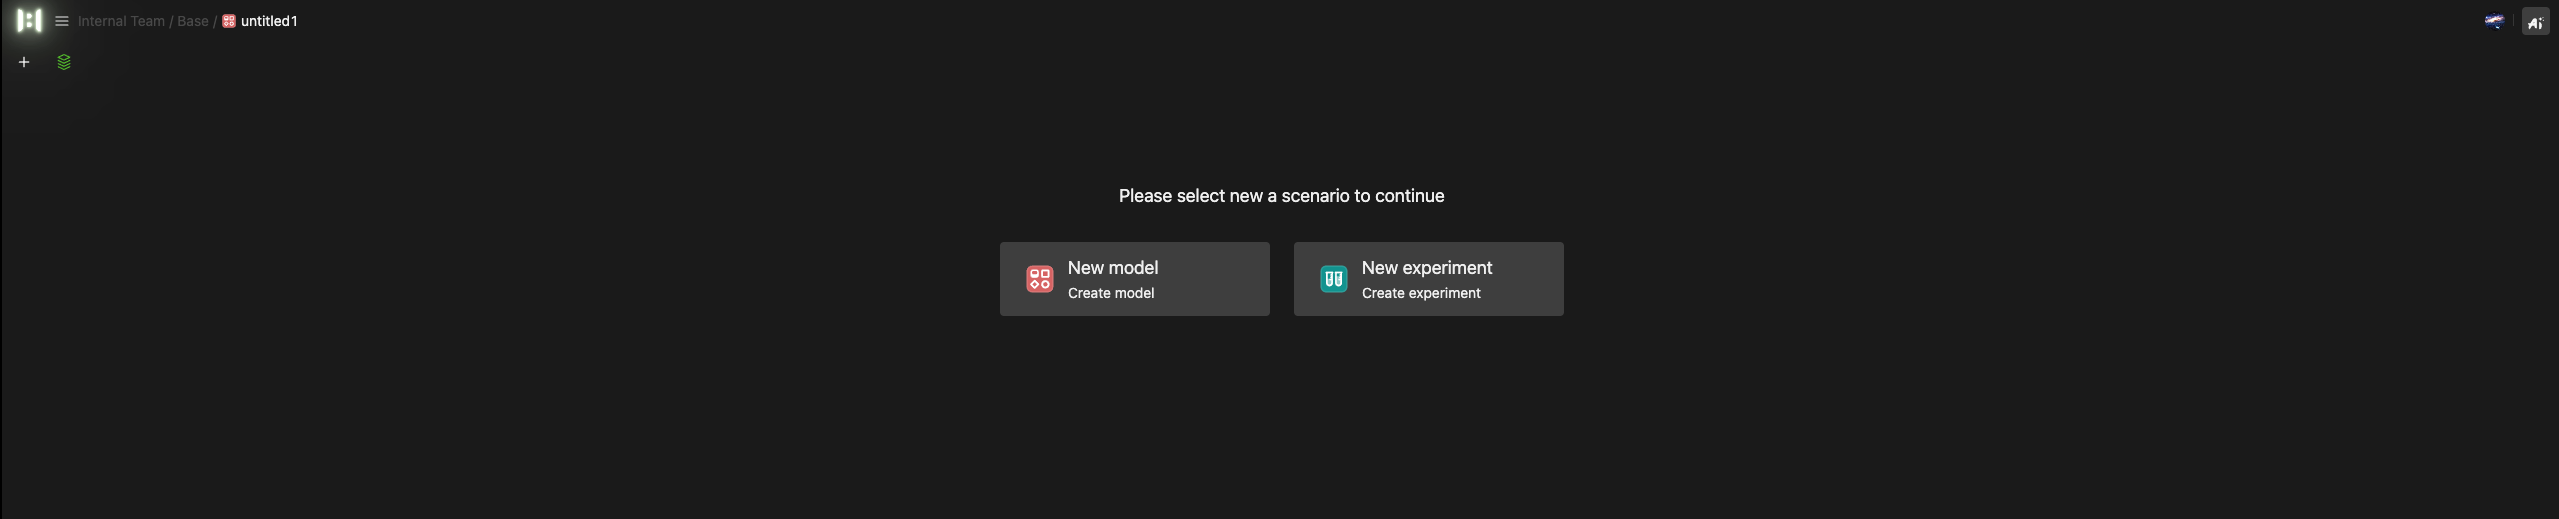
- Choose Scenario Type
- A dialog will appear prompting you to select the type of scenario for your new Holo File (e.g., New Model, New Experiment) and enter an initial scenario name.
- A dialog will appear prompting you to select the type of scenario for your new Holo File (e.g., New Model, New Experiment) and enter an initial scenario name.
- Enter Editing Mode
- After confirming, the new Holo File (containing the initial scenario) will be created, and you'll be taken directly to the file editing interface.
Managing Files
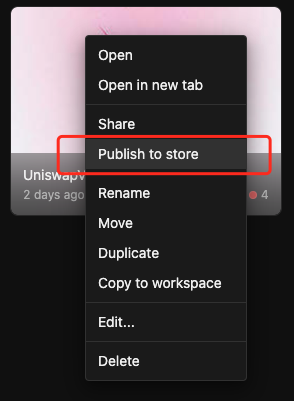
Most file management operations are performed using the right-click context menu that appears when you right-click on a file card or list item.
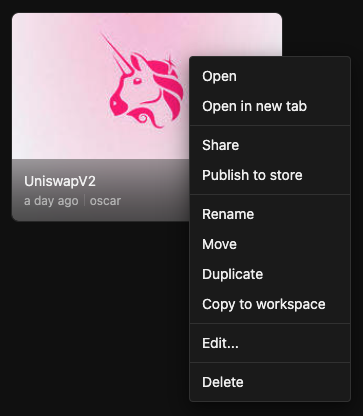
Common Actions
The table below summarizes these common actions. More detailed explanations for complex operations like "Share" or "Publish to Marketplace" follow in subsequent sections.
| Operation | Access Path | Outcome & Key Notes |
|---|---|---|
| Open | Context menu; or single-click file card/list item. | Enters the file editing interface in the current page/tab. |
| Open in New Tab | Context menu. | Enters the file editing interface in a new browser tab. |
| Share | Context menu; or "Share" button in file editor toolbar. | Opens the "Share & Publish" dialog for collaboration. |
| Publishing to Marketplace | Context menu; or via the "Share & Publish" dialog. | Opens the multi-step dialog for publishing the file to Marketplace. |
| Rename | Context menu; or inline edit in list view; or double-click name in editor breadcrumb. | Allows renaming the file if you have permission. |
| Move | Context menu → "Move" → Choose destination folder → Confirm. | Moves the file to another folder within the same workspace. The file is removed from its original location but is not deleted. Internal links are preserved. |
| Duplicate | Context menu. | Creates a duplicate of the file in its current folder. Internal links are preserved. |
| Copy to Workspace | Context menu → "Copy to workspace" → Choose target workspace/folder → Confirm. | Copies the file to a folder in a different workspace. Requires appropriate permissions. |
| Edit... | Context menu → "Edit..." | Opens the "File Properties" dialog to configure metadata like name, tags, description, and cover. |
| Delete | Context menu. | Moves the file to the Trash for temporary storage; can be restored before permanent deletion. |
Sharing Your Files
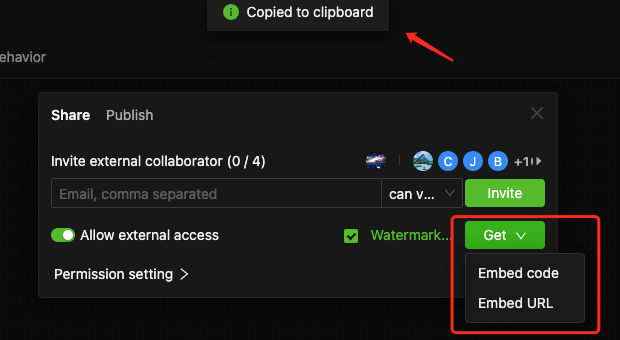
Selecting Share from the file's right-click menu, or clicking the Share button in the top-right of the file editing interface, opens the "Share & Publish" dialog. Below is an overview of the Share tab.

-
Invite External Collaborators
- Enter email addresses (comma-separated) to invite users outside your workspace team to collaborate on this file.
- See Collaborating and Sharing for details.
-
Set Permissions for Current Collaborators
- Manage permission roles for existing collaborators.
-
File-Specific Permission Settings
- Configure operational permissions for this file, overriding workspace-level defaults.
-
Allow External Access for Embedding (Switch)
- Enable to generate embed codes/links for public access.
- Disable to revoke access to previously shared embeds.
-
Configure Watermark for Embedded Page
- If embedding is allowed, click "Watermark" to customize text, font, color, angle, and opacity. A preview is shown.
 Tip
TipWatermark settings apply per sharing instance and don't affect previous embeds.
- If embedding is allowed, click "Watermark" to customize text, font, color, angle, and opacity. A preview is shown.
-
Get Embed Code/URL
- If embedding is allowed, hover over "Get" to choose and copy Embed code or Embed URL.
- Selecting an option automatically copies it to your clipboard.
 Notes
Notes- Collaborators need appropriate owner-set permissions to obtain embed links/codes.
- Page embedding is scenario-specific; thus, the external access switch for embedding is independent for each scenario.
- This switch does not affect the file's overall access if it's published to the Community/Marketplace.
-
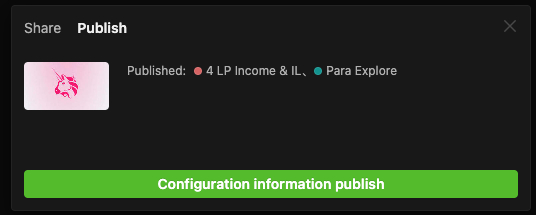
View Publish Status / Access Publish Settings
- Shows the file's current publishing status in Marketplace and provides access to Publish Settings.
- Shows the file's current publishing status in Marketplace and provides access to Publish Settings.
Publishing to Marketplace
Publishing routes
You can publish your Holo Files to Marketplace through several methods:
-
From File Context Menu: Right-click a Holo File and select Publish to Marketplace.
-
From "Share & Publish" Dialog: As mentioned in point (7) of the "Share" dialog walkthrough, access the publish settings from there.
-
From Marketplace: Click the "Publish" button on the main HoloBit Marketplace page.
Publishing Settings
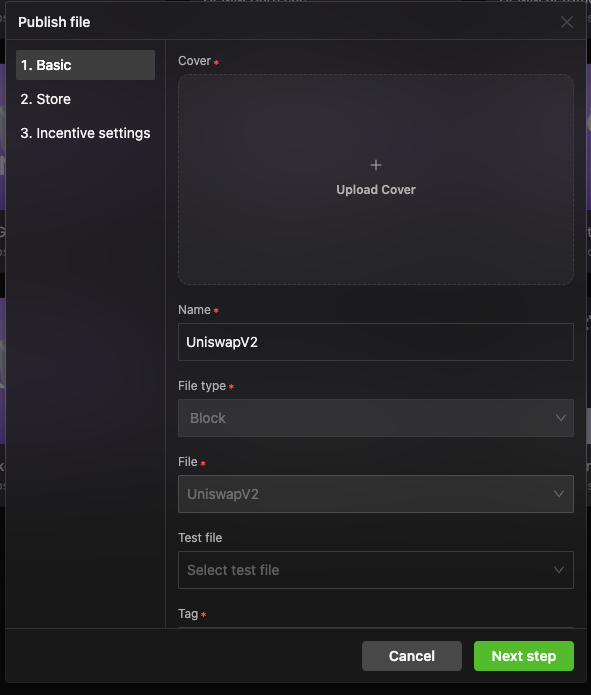
All routes open the "Publish file" dialog:
Step 1: Basic Information
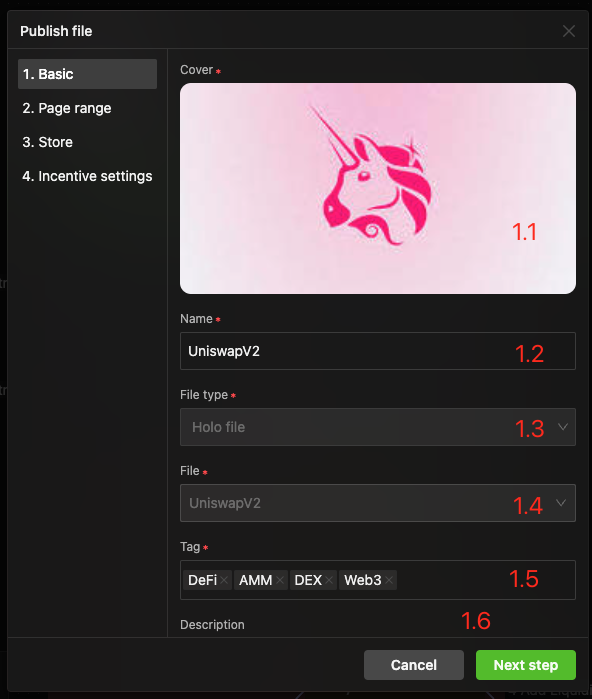
- 1.1 Cover Image,
- 1.2 Published Name,
- 1.3 File Type,
- 1.4 Source File,
- 1.5 Tags,
- 1.6 Description.
Step 2: Content scope(Specify the scenarios to include)
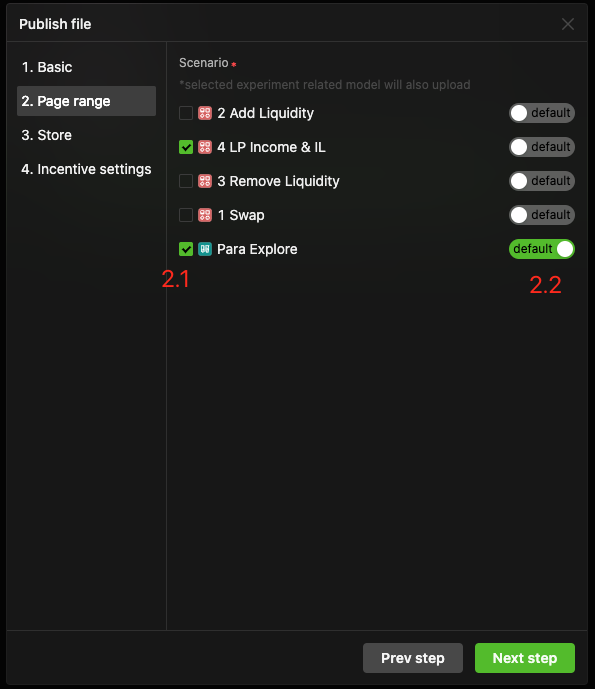
- 2.1 Select Scenarios: Check which scenarios to include.
- 2.2 Set Default Landing Scenario: Choose the initial scenario viewed in Marketplace.
Hidden scenarios are excluded. Selecting an Experiment Scenario often auto-includes its base Model Scenario.
Step 3: Marketplace(Setting Pricing)
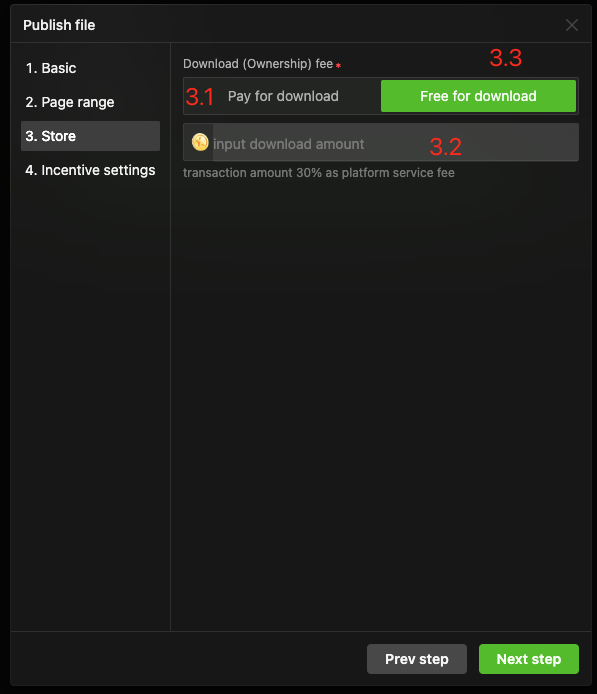
- 3.1 Pay for download
- 3.2 Download Price Input: Enter the price for the file.
- 3.3 Free for download
Step 4: Incentive Settings
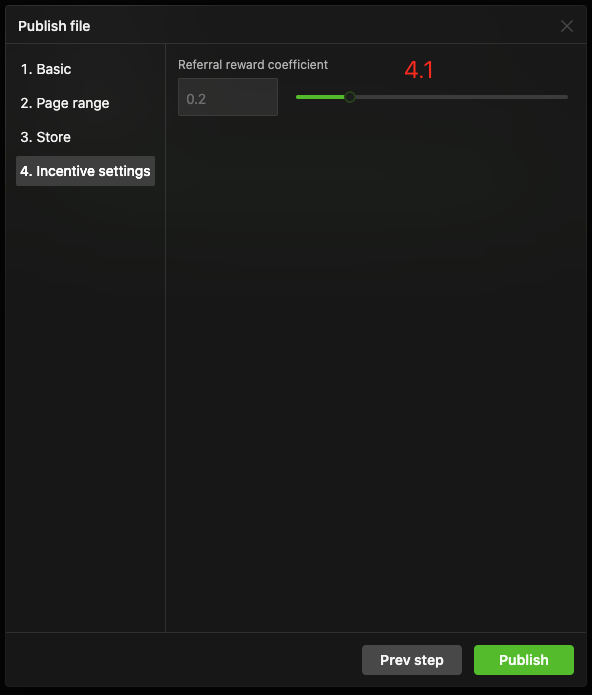
- 4.1 Referral Reward Coefficient: Set a percentage for referral rewards.
- Updating a Published File:
- Re-publishing the same file updates its Marketplace entry rather than creating a new one.
- This can be done via the same three routes or from your Marketplace profile.
- Unpublishing a File:
- See Managing Your Published Files in the Marketplace chapter.
File Scenarios
Within the Holo File editing interface, manage scenarios using the scenario bar.

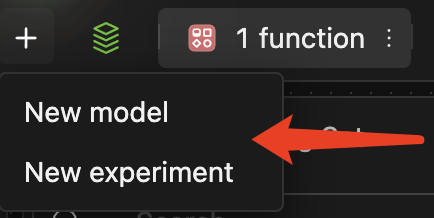
Creating Scenarios
Hover over + (left of scenario bar), and choose a scenario type.
Managing Scenarios
1. From the Scenario Title Bar:
- Switch Scenario: Click any scenario's title tab to make its canvas active for editing.
- Context Menu: Hover over a scenario's title tab and click the
⋮(kebab) that appears on its right. This opens a menu with options like: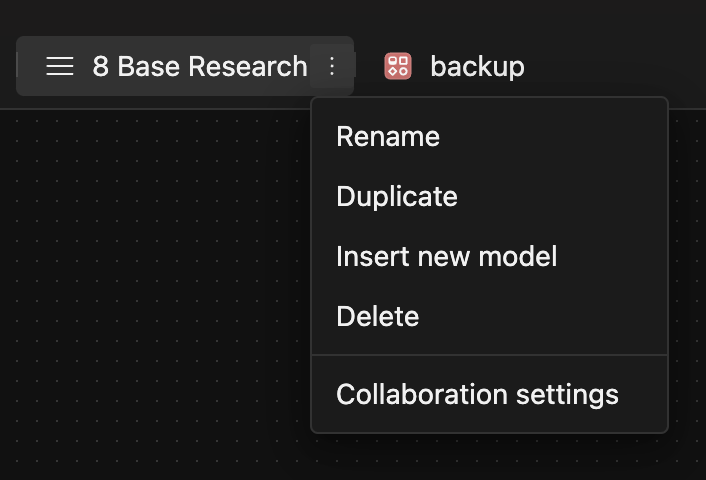
- Rename
- Duplicate
- Insert New Model (creates a new, blank model scenario)
- Delete
- Collaboration settings (to manage permissions for this specific scenario).
- Scrolling Tabs: If there are more scenario tabs than can fit, use mouse scrolling (or touchpad gestures on Mac) over the title bar area to scroll horizontally.
- Reorder Tabs: Drag the icon (often to the left of the scenario title) to rearrange the order of scenario tabs.
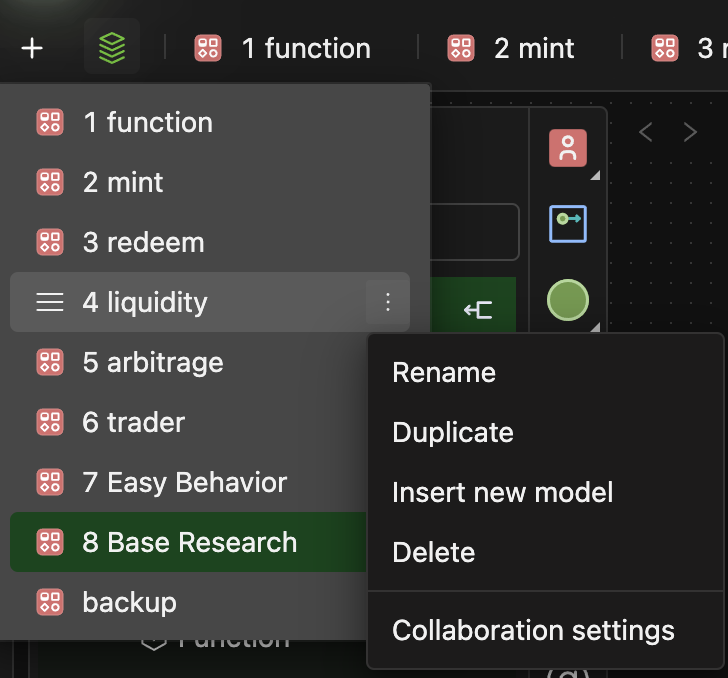
2. From the Scenario List View:
- Clicking a button (often labeled with the current scenario count or a list icon) in the scenario management bar typically opens a dropdown list of all scenarios in the Holo File.
- You can perform similar management operations (Rename, Duplicate, Delete, etc.) on scenarios from this list view, usually via context menus or action icons next to each scenario name.
Block Files
Creating Block Files
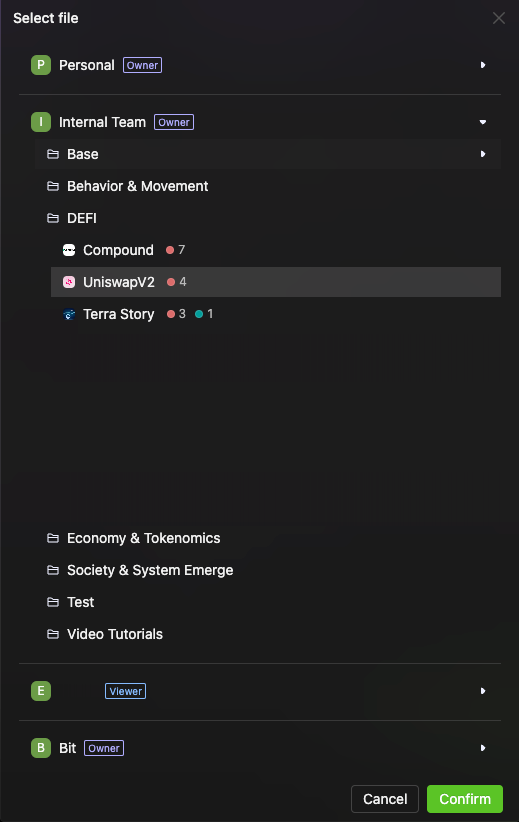
1. From Workspace Library:
-
Navigate to Library → Block tab. Click + New Block.
-
In the dialog box, configure each item one by one. Items marked with a red asterisk * are required.
-
Click Confirm. You'll typically enter block editing interface.
2. From System Simulation Modeling Interface:
- Blocks can also be created directly during modeling. (Details in modeling guide chapter).
Managing Block Files
- Similar to Holo File operations.
- Refer to the Basic Interface chapter for details on the Block editing interface.
Publishing Blocks to Marketplace
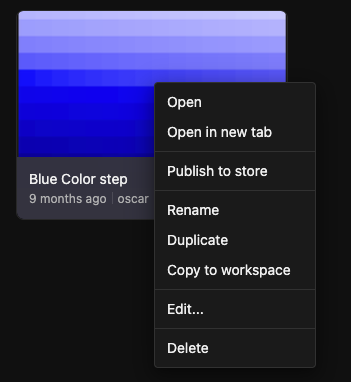
Select Publish to Marketplace from a Block's context menu. The "Publish file" dialog is similar to Holo Files, with key differences:

- Basic Information:
- Test file / Example Holo File (Optional): Specify an example Holo File to demonstrate the Block's usage.
 Purpose of Example Model
-
This is to help users understand the Block's use; it's not mandatory nor strictly linked.
-
Example use of an example model:
- Trying to understand the "Blue Step" Block by reviewing its associated example model.
-
- Marketplace Pricing: May include settings for reuse royalties if applicable.
Global Tag Sets
A workspace can have multiple global tag sets. Upon entering a workspace, click the "Tagset" button under the "Library" tab to open the dialog box, as shown below.
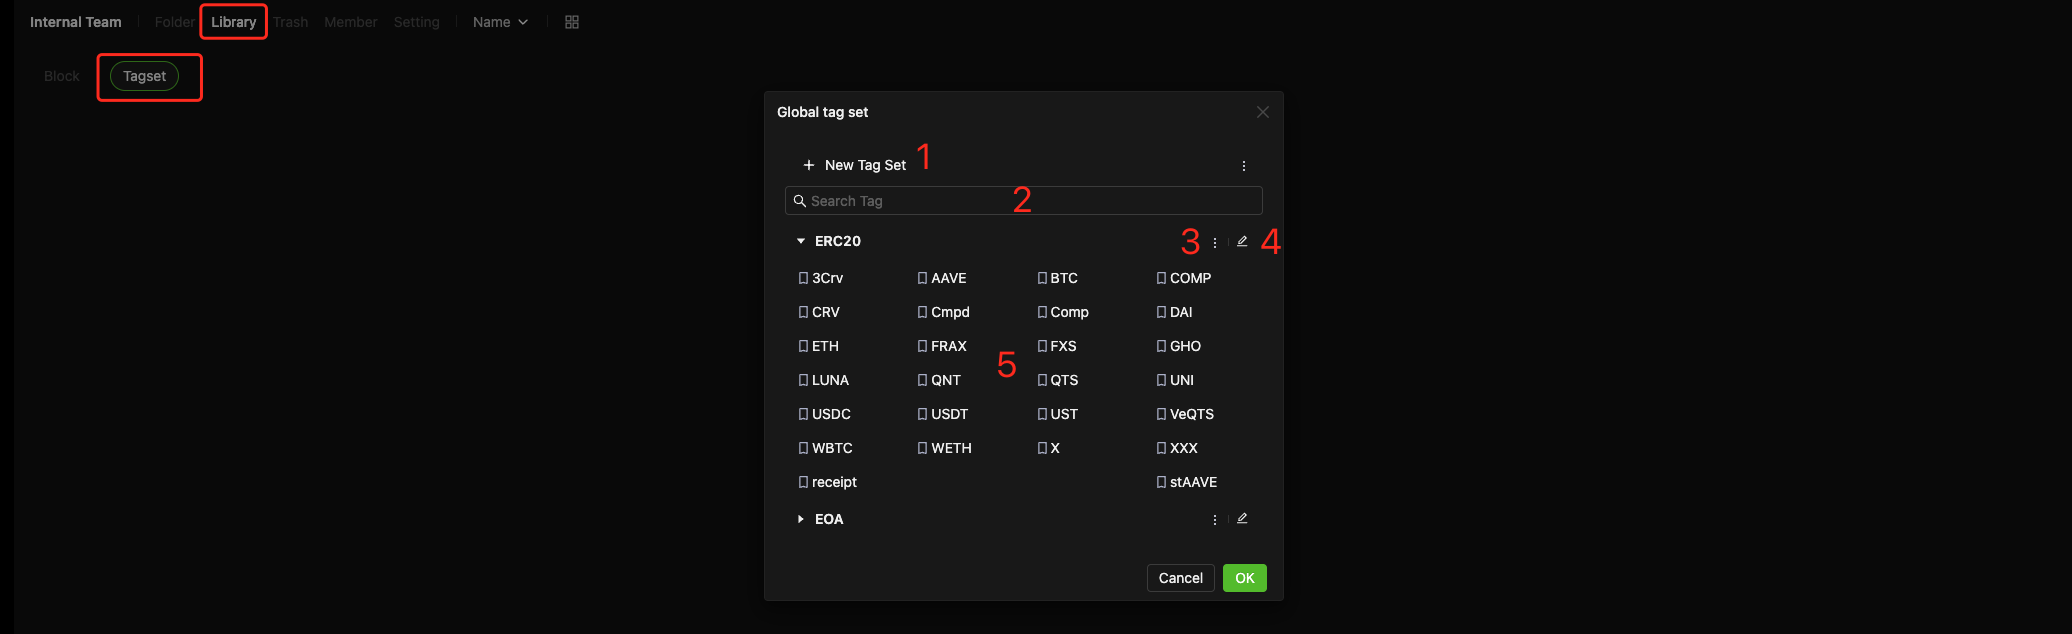
Alternatively, when in a model scenario, you can directly select the appropriate option under the "Tag Set" tab in the left navigation sidebar to open the Global Tag Set dialog.
1. New Tag Set Button
-
Click the button to open the dialog Box.
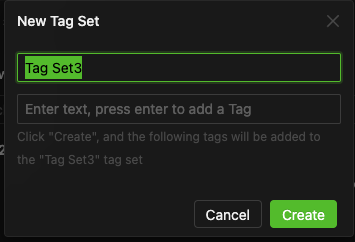
-
Enter the tag set name in the upper input field.
-
In the lower input field, type tag names for this set. Press Enter after each tag. Repeat until you've added all desired tags.
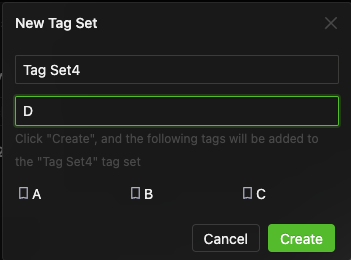
-
Click the "Create" button to finalize your new tag set.
2. Search Box
You can use the Search Box for quick tag lookup.
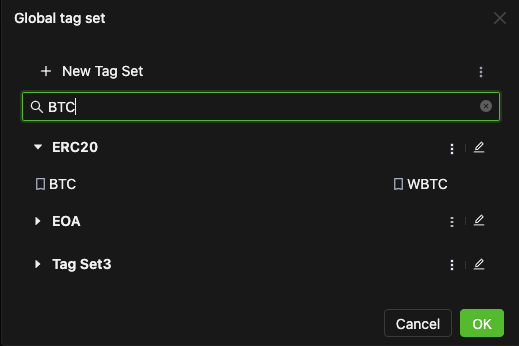
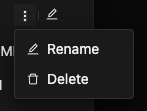
3. Tag Set Menu
This menu allows you to delete and rename an existing tag set.
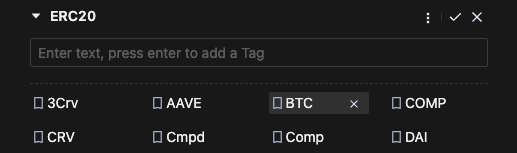
4. Tag Set Editing
Click the "Edit" icon to open the dialog box. Here you can,
-
Create a new tag
Type tag name in the input field and press Enter to add it.
TipTag names within the same tag set cannot be duplicated. Entering an existing name won't create a new tag.
-
Delete an existing tag
Hover over the tag you want to delete and click the "x" on the right.
-
Exit edit mode
Click the "√" in the top-right corner to save your changes.
5. Tag Overview
You'll see all the tags and tag sets you've created in the Global Tag Set dialog box.