Modeling Guide
Global Settings
Properties Panel
Click on the root canvas and the right-side properties panel will display the global configuration options for the current scenario.
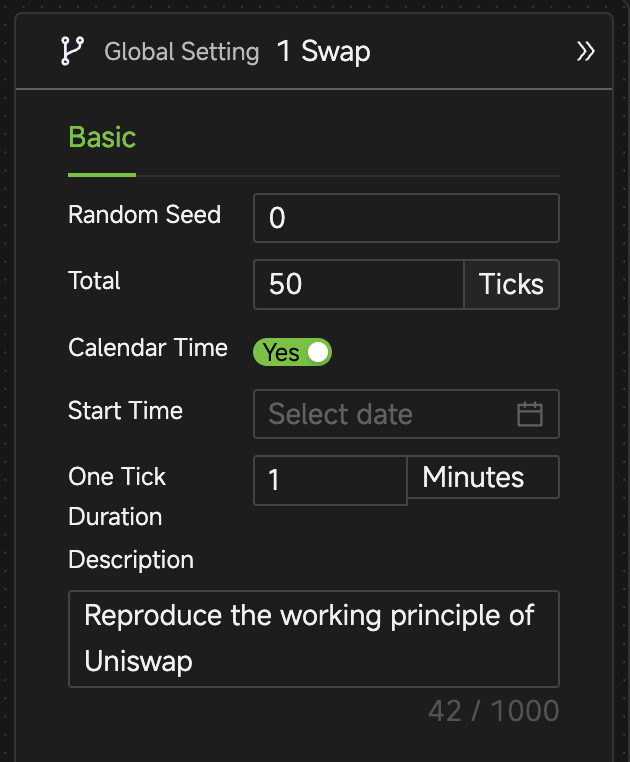
Random Seed
Controls the seed used for all random sampling. When set to a non-zero value, it enables precise repetition of model running results.
Total Ticks
Sets the maximum Tick count for the simulation run.
Calendar Time
-
You can set the calendar start time and the calendar duration each Tick represents, allowing the model to advance in calendar time.
-
Once the calendar mode is set globally, the global built-in variable
Nowwill return the DateTime value according to the specified calendar mode.
Description
You can input any content as a description for this scenario.
Modeling Operations
Building a model involves dragging and dropping components onto the canvas and setting up these objects.
Create Objects
Drag the target modeling component or Block from the component bar to the canvas to create an "instance object".
Generally, each modeling element in the component bar is referred to as an XX component, and once dragged onto the canvas, it is referred to as an XX object.
Properties Panel
-
Click on an object, and a properties panel appears on the right sidebar where you can configure object properties.
-
Proceed with properties one by one.
Style Control Bar

When you left-click an object, a control bar appears above it. For example, when selecting an agent, the control bar offers the following functions (from left to right):
- Enter the internal canvas of the entity.
- Select behaviors and properties to display on the cover.
- Collapse to the component icon.
- Add an emoji tag.
- Change the color.
- Adjust the title font size.
- Edit the object description.
- Access additional options via the three-dot menu.
Left-click the object again to hide the control bar, while keeping the object selected.
Right-Click Menu
-
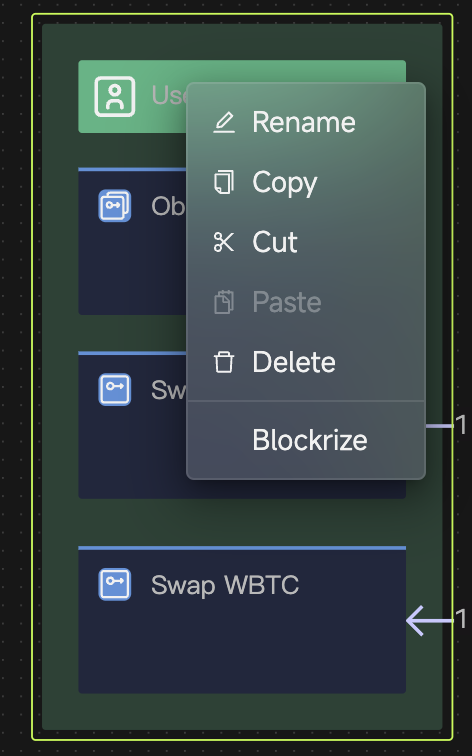
Right-click on a component object to pop up a menu of relevant options. You can select the options you wish to use.
-
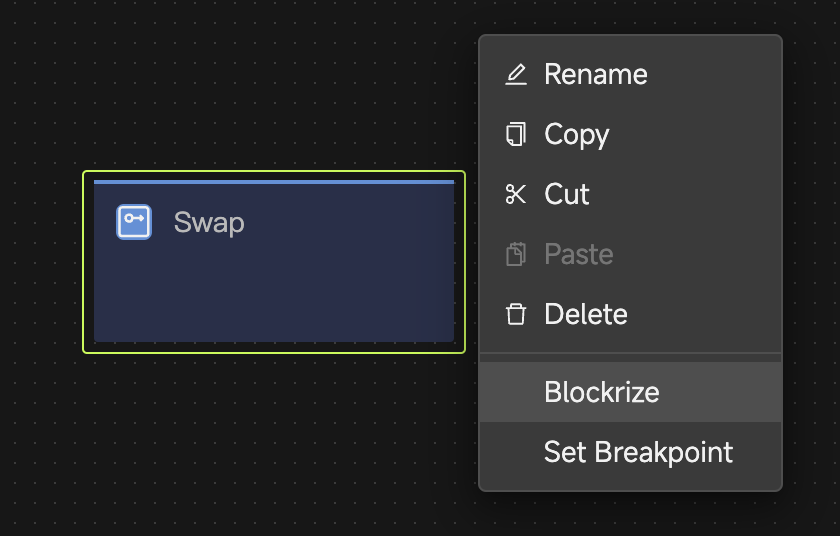
For instance, if you right-click on an Agent object, a 'Blockrize' option appears in the context menu. By selecting 'Blockrize', you can save this Agent object as a block in the library. Other options function similarly and won't be detailed further.
Others
-
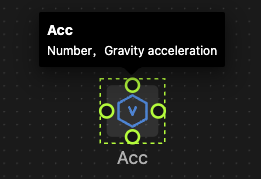
Mouse Hovering
Hover your mouse over a component to show its description.
-
Batch Layout
-
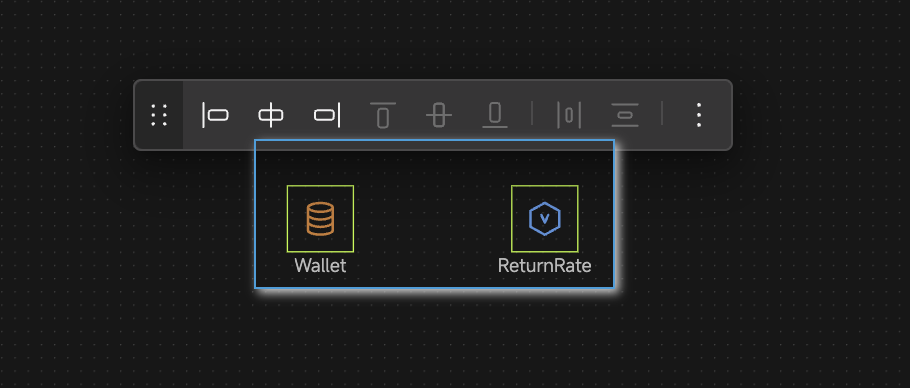
Right-click and drag the mouse to create a selection box, or hold down the Command key (on Mac) or Ctrl key (on Windows) to select components one by one.
-
Once multiple components are selected, the style control bar for layout will appear. You can choose different alignment options to automatically arrange the components in batches.
-
-
Process Modeling
Detailed information on process modeling and its specific elements is covered in the Process Steps chapter.

Block Operations
Create Blocks
There are several ways to create blocks:
-
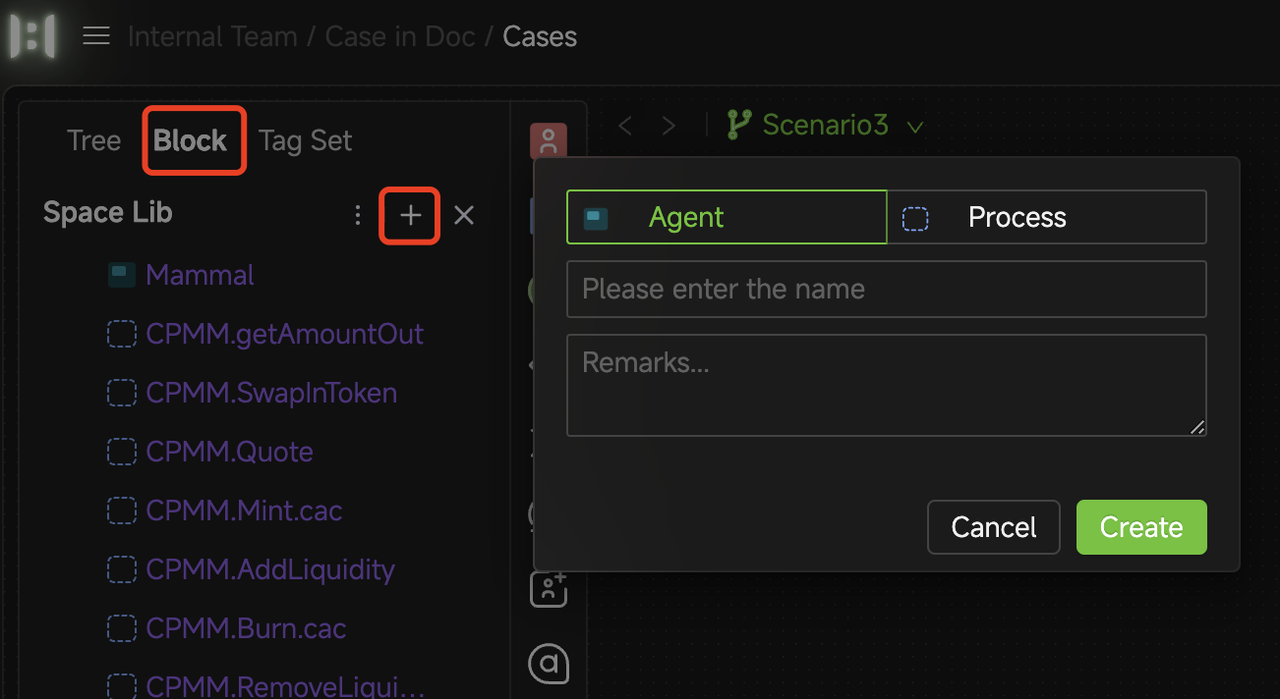
Create blocks in the modeling interface
Choose the "Block" tab in the left sidebar of the modeling interface, click the "add" + button, and in the pop-up dialog box, select the type, input the name and description. After clicking the Create button, a blank canvas will appear, and you can start editing the block definition.
-
Create blocks from the file management interface
Choose the Block tab in the workspace and click the "New block" button. For more details, see the Files and Library Chapter.
-
Save existing instance objects in the model as blocks
Right-click on an entity or process in the model canvas, and select Blockrize from the pop-up menu.
Edit Block Definitions
-
Access the block editing via the "Block" tab in the modeling interface
-
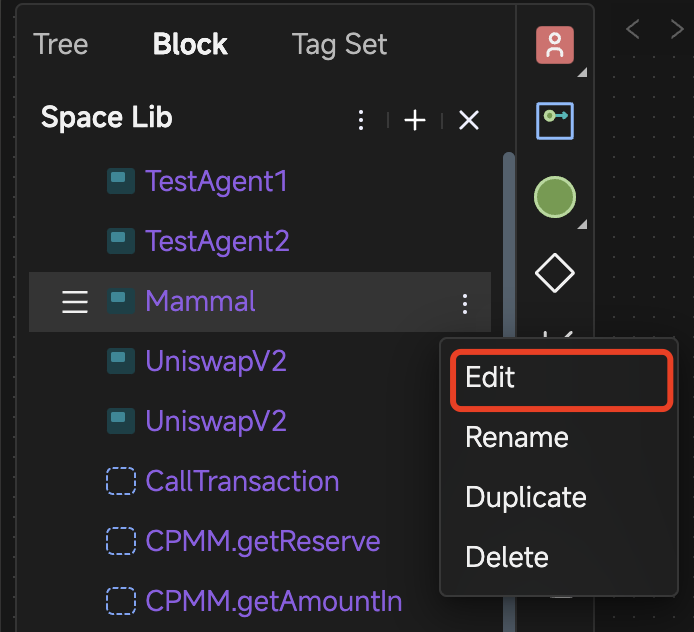
Switch to the "Block" tab in the left sidebar.
-
Hover the mouse over the three-dot menu "..." of the corresponding block to pop up a menu and select Edit.
-
-
Enter the Block editing interface from the File management interface.
-
In the block editing interface, build the block definition using the same modeling tools as in the model editing interface.
Use Blocks for Modeling
-
Switch to the Block tab in the left sidebar, select and drag the target block to the canvas (instantiation).
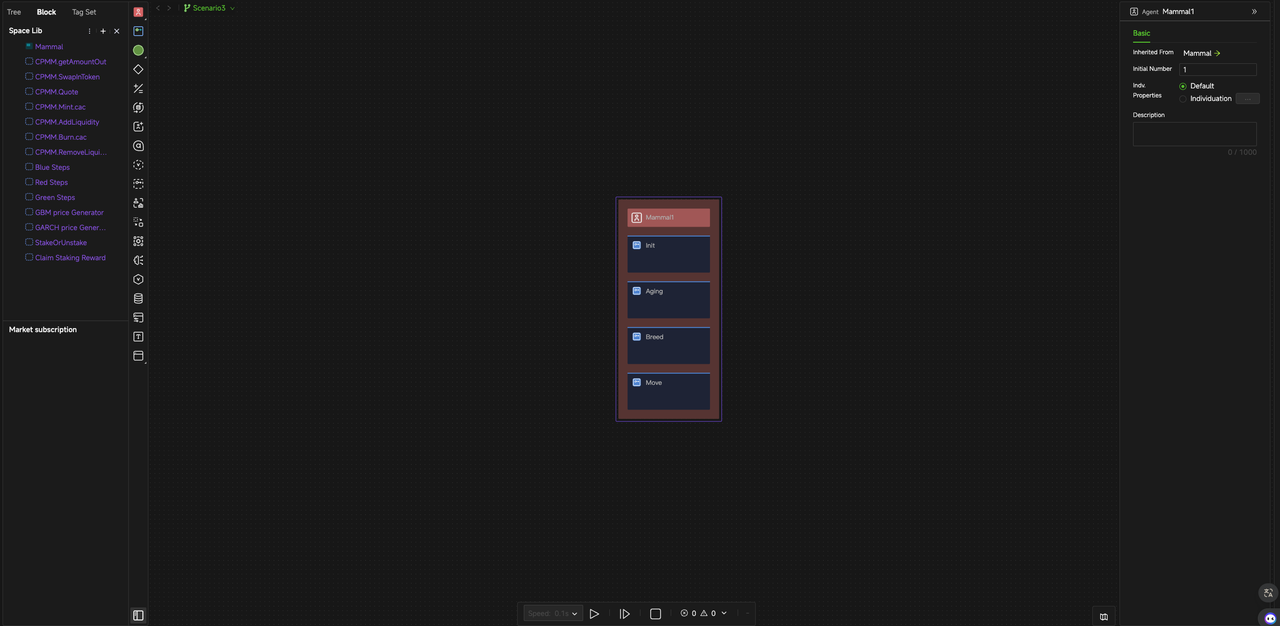
-
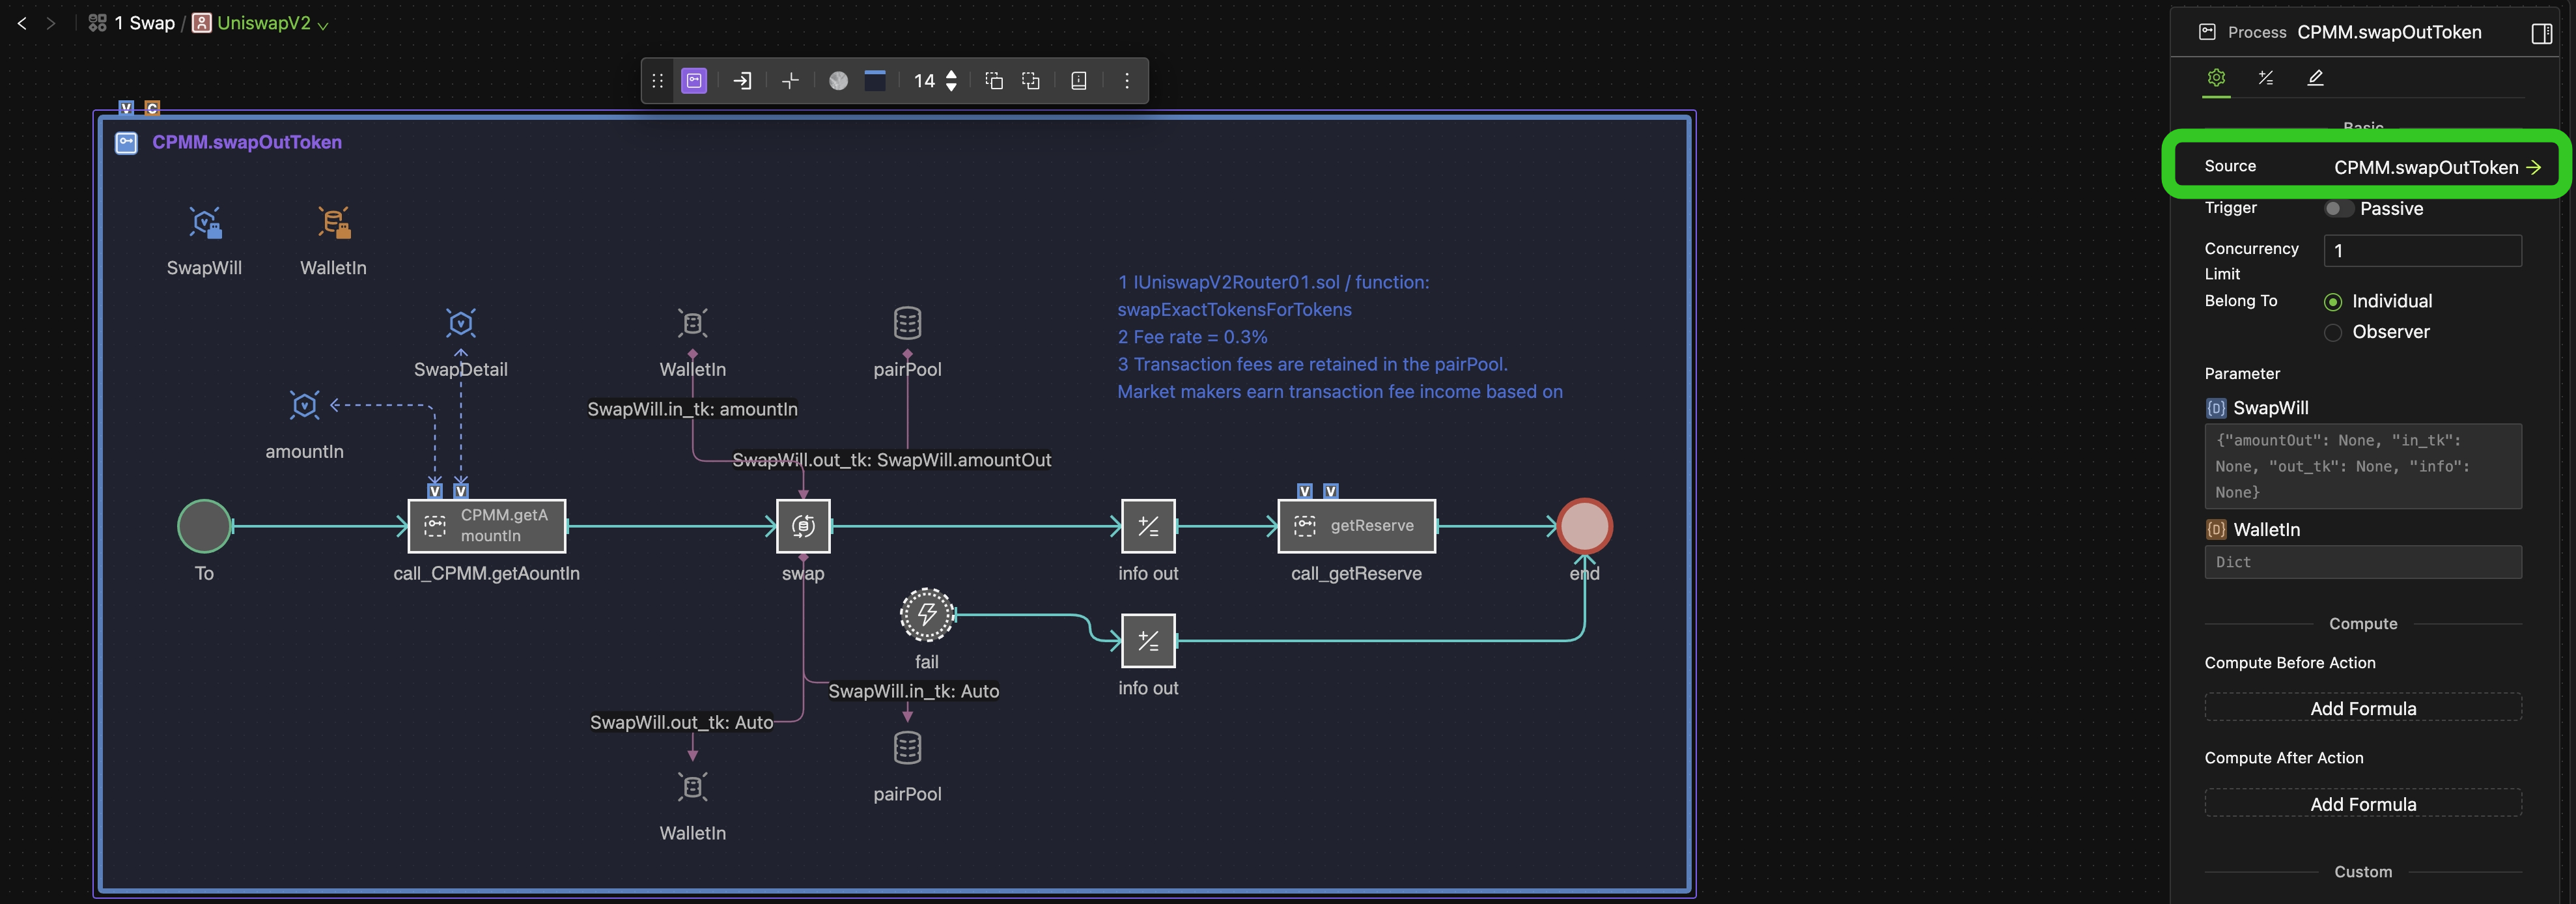
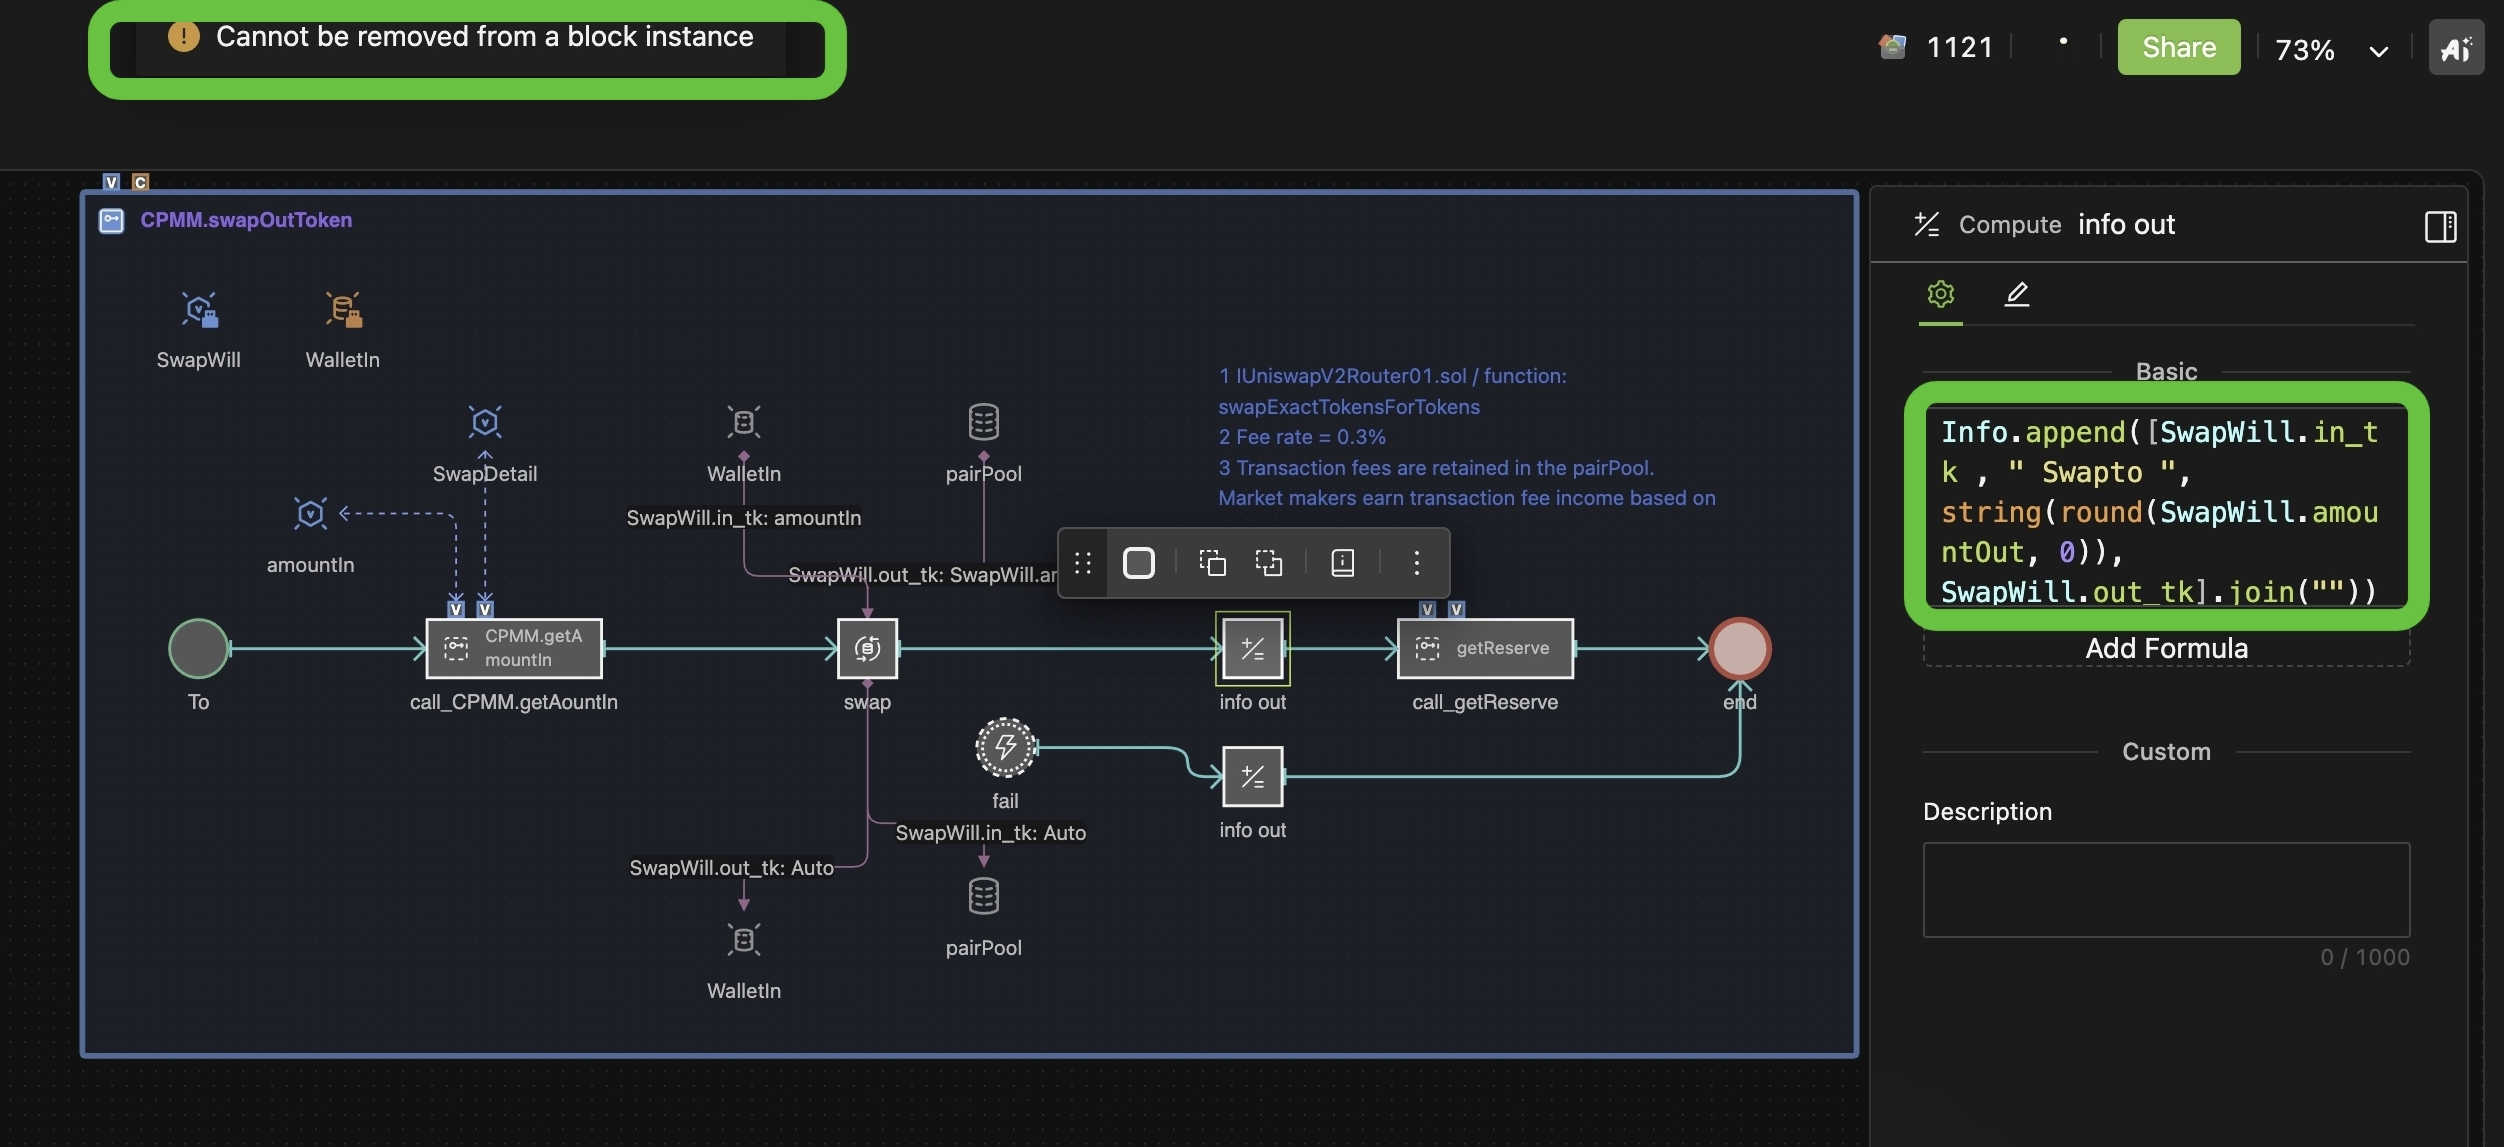
You cannot edit the structures of block instances in the model, but can change the property settings of the instance object or the internal component object (set in the right-side properties panel).
Like "packages" in programming, proper use of blocks greatly improves modeling efficiency. In addition to creating your own, you can find blocks published by other users in the HoloBit Marketplace for your own modeling.
Update Block Instances
When block definitions are modified, existing instances of those blocks in your model may become out of sync with their definitions. To update a block instance:
-
Right-click on the target block instance
-
Select "Update Block" from the context menu
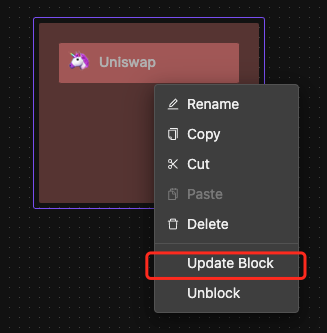
Note: After updating, always verify your model's behavior, as property settings may have changed during the update process.
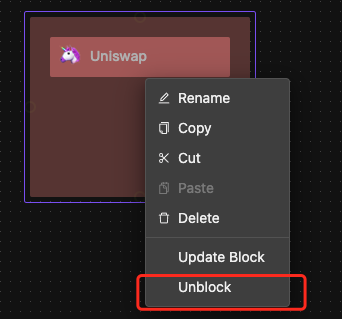
Unblock
You can convert block instances into standard objects to gain full editing flexibility:
-
Right-click on the target block instance
-
Select "Unblock" from the context menu
Once unblocked, you can modify all aspects of the object freely, including its:
-
Internal components and structure
-
Connections and relationships
-
Component properties and settings
Tag Operations
Navigate to the left sidebar in your HoloBit interface. Click on the "Tag Set" tab. You'll see all tag sets and their associated tags shared across all scenarios in the current model.
Create Model Tag Sets
When you click the "+ New Tag Set" button, a dialog box to enter the tag set name will pop up. Enter the name and click Create. Subsequent operations are identical to creating global tag sets.

Push Model Tag Sets to Global
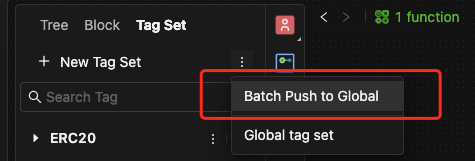
Batch Push
-
Select the "Batch Push to Global" option from the kebab/three-dot menu next to the "+ New Tag Set" button.
-
All model tag sets will be merged into Global Tag Sets, with same-name sets combined.
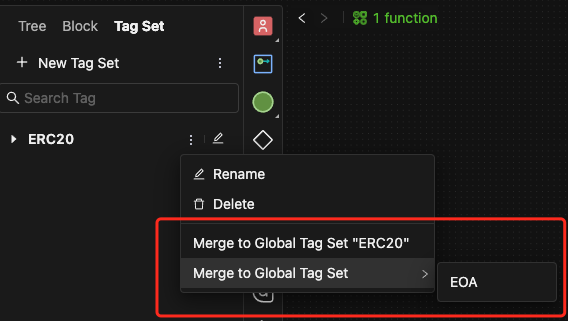
Individual Push
-
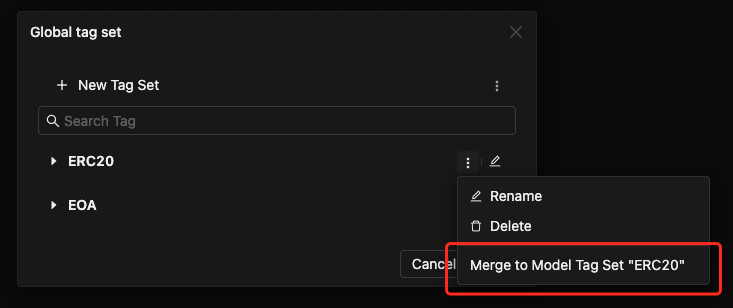
Locate the specific tag set you want to push. Then select the "Merge" option from its own kebab/three-dot menu on the right of the tag name.
-
All tags in the target set will be merged into the selected Global Tag Set, with same-name sets combined.
Merge Global Tag Sets into Your Model
-
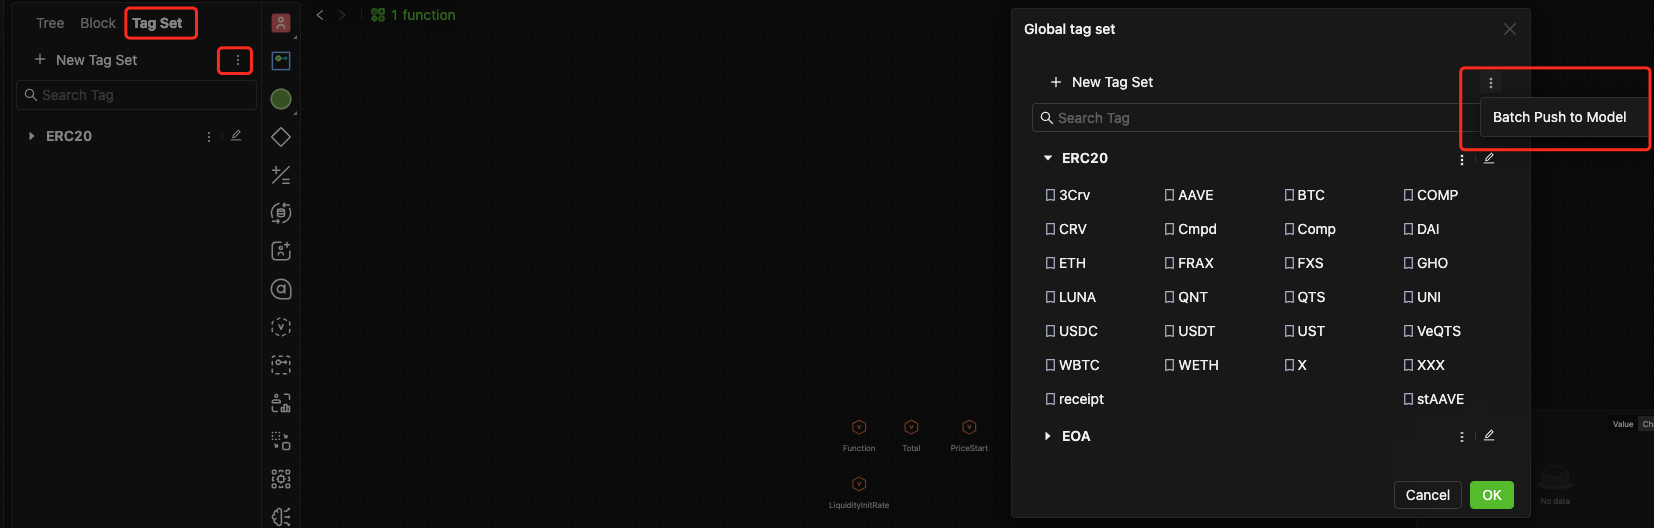
Select the "Global tag set " option from the kebab/three-dot menu next to the "+ New Tag Set" button. This allows you to access the Global Tag Set in your workspace.
-
Then, a pop-up dialog for the Global tag set will appear.
-
Hover over the kebab/three-dot menu in the first row and select the "Batch Push to Model" option. All global tag sets will be merged into your current model.
-
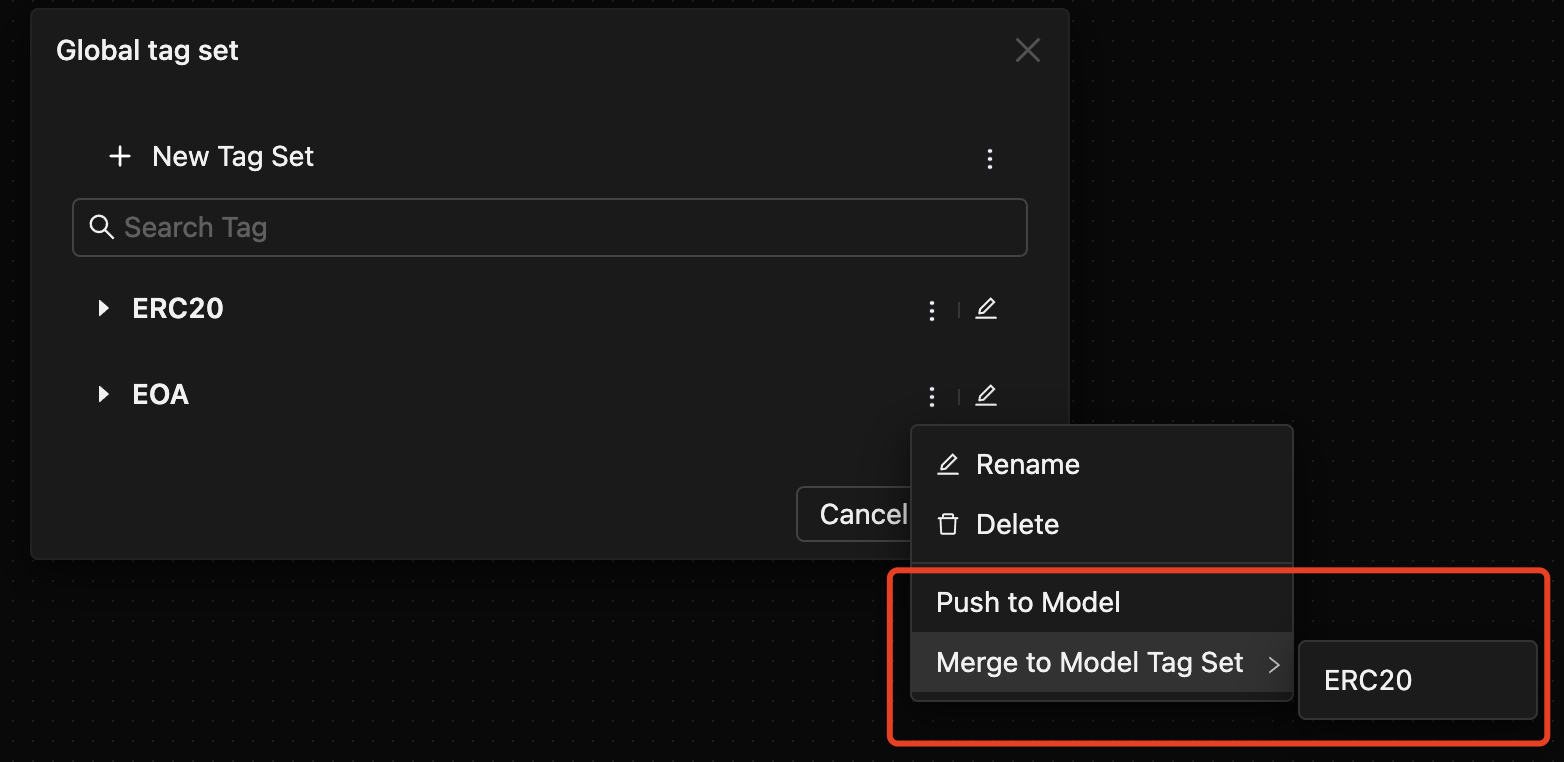
A similar operation can be performed within the corresponding tag set's menu if you only want to import a specific Global tag set into your files.
-
If a global tag set has the same name as one in your current model, it will be automatically merged into your model tag set, as shown in the left image above. When a global tag set doesn't have a namesake in the current model, you can push the desired global tag set as a new tag set in your model or specify an existing tag set to merge with the global tag set.
-
Here, you can directly manage Global tag sets. The operations here are identical to those in the workspace Library's Tag Set tab.
Create and Delete Tags
-
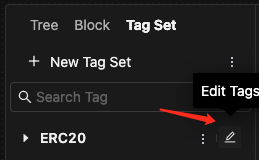
Each tag set has an Edit button (usually a pencil icon) on the right of its kebab menu. If you click this pencil, you can access all tags within the set.
-
In edit mode, type new tag names in the input field below the tag set name. Press Enter after each tag to add it to the existing set.
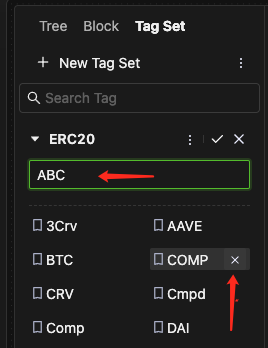
-
If you want to delete a tag, hover over the target tag. There will be a Delete button (usually an "x" icon). Click it, and the tag will be removed from this set.
- The tag values within the same tag set cannot be duplicated. In other words, there cannot be two tags with the same name within the same tag set.
- Different tag sets can share names in HoloBit. When working with tag sets, always double-check your selection, especially if multiple sets share the same name.
Drawing System Diagrams
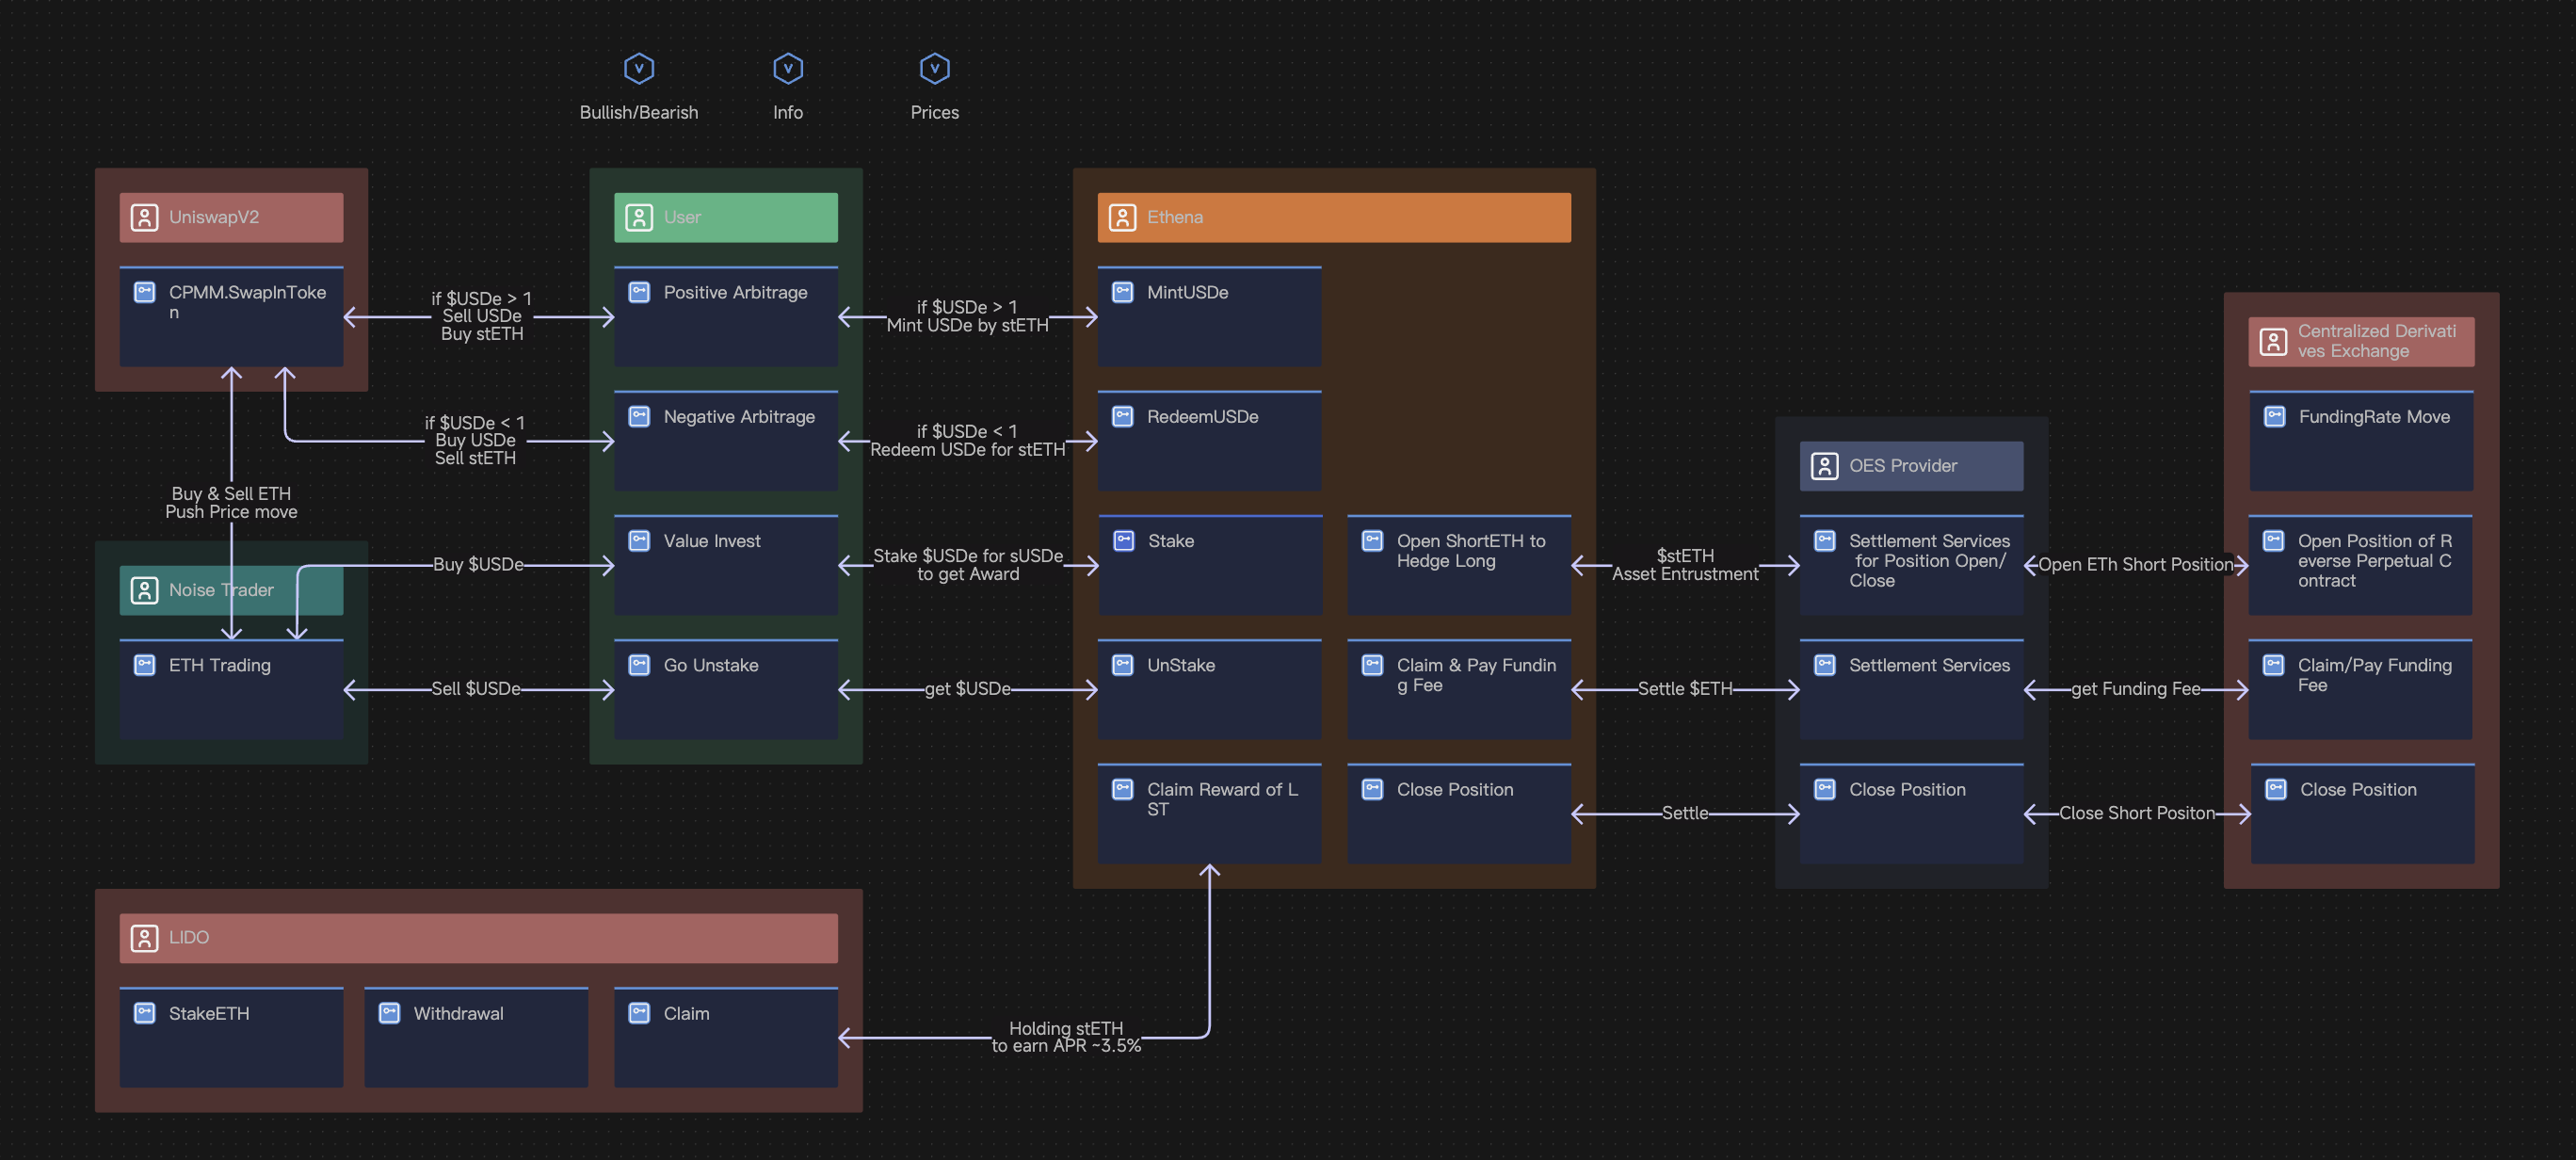
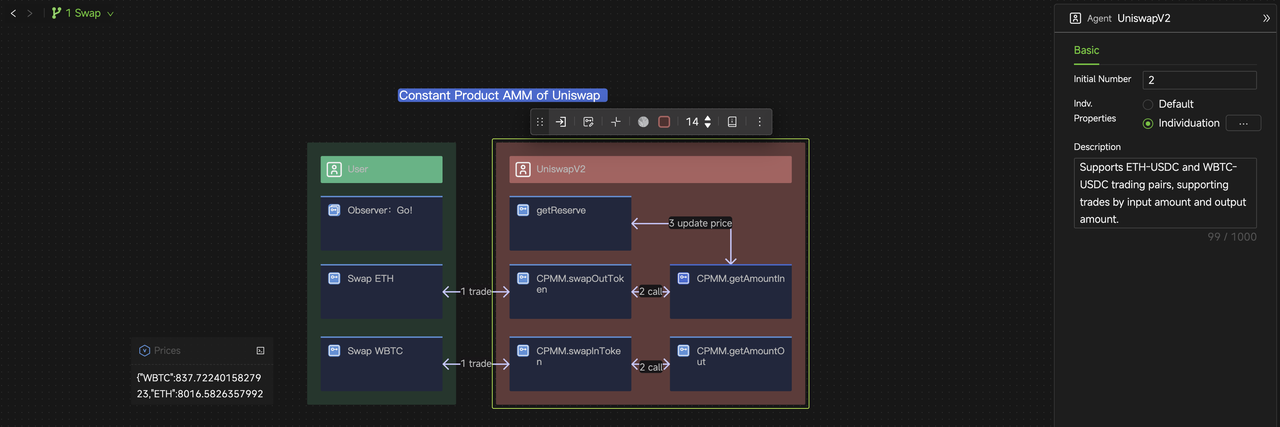
- Entities make up the model, and users can read the internal processes of the entity from its appearance cover. Therefore, for any system, using Annotation Lines to connect interactive objects (entity, behavior, data components) can draw their interactive relations and thus draw a "system diagram" that reflects the system's structures, mechanisms, and interactions.
- Different from modeling, drawing system diagrams are subject to individual understanding and may vary from person to person. Since it only involves the use of Annotation Lines, the layout of entities on the canvas, the setting of style, etc., and does not involve syntax logic, it has no effect on the simulation results.
- For more details, please refer to the Annotation Lines chapter.
From this perspective, you can understand HoloBit as a runnable system design diagram.
System Upgrade Prompt
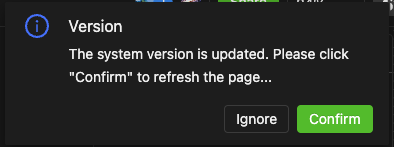
- When there's a system update, a notification box will pop up in the upper right corner of the interface.
- After confirming, the current page will refresh and upgrade to the newest version.
- If you ignore it, the page will not refresh and temporarily maintain the old version, but once the page is refreshed, it will upgrade to the newest version.